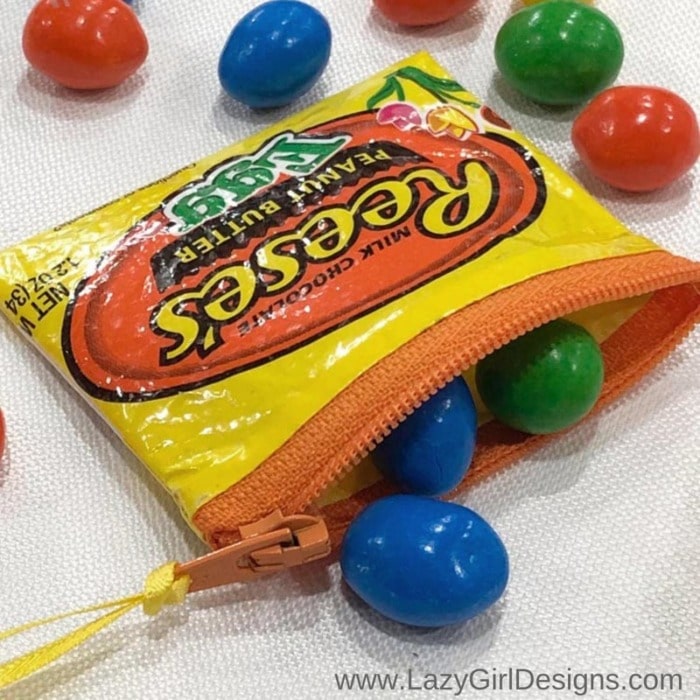
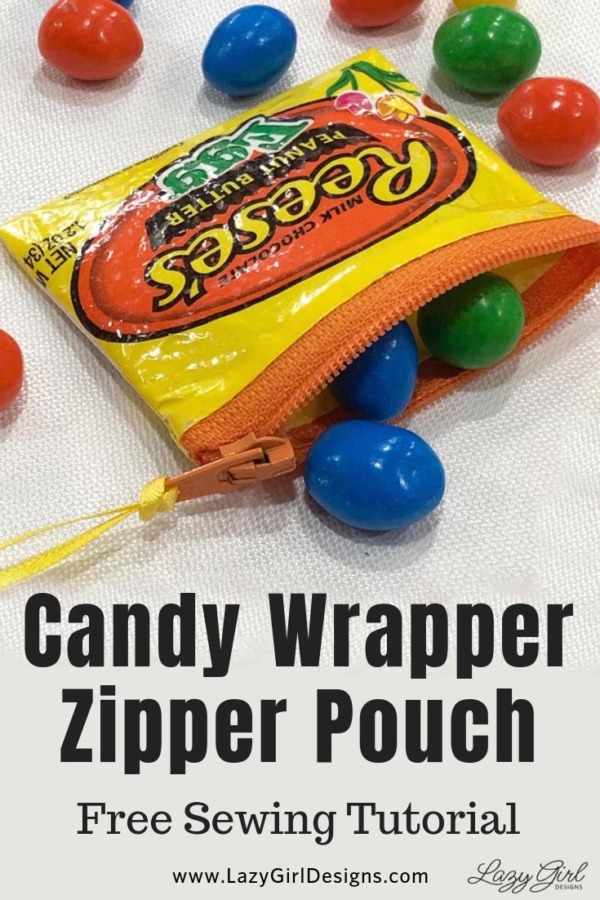
How To Make A Sweet Candy Wrapper Zipper Pouch
Turn a candy wrapper into a zipper pouch with this easy DIY free pouch pattern.
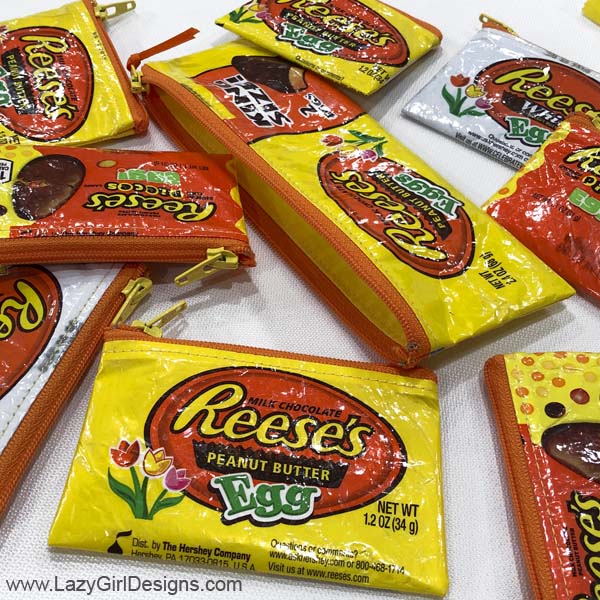
Lazies, I’m a sucker for a pretty candy wrapper and I love finding ways to upcycle or recycle them into craft projects. So, head to the grocery, buy the candy, then use my free zipper pouch pattern to make a cute candy wrapper zipper pouch. PS: You can use fabric instead of candy wrappers. I made these to go in Easter baskets this year, but you can make them any time. And check out my zipper installation videos where I share my tips for using a regular presser foot to sew a zipper. Read on for an overview of the project, then GRAB the complete step-by-step free printable pattern below.
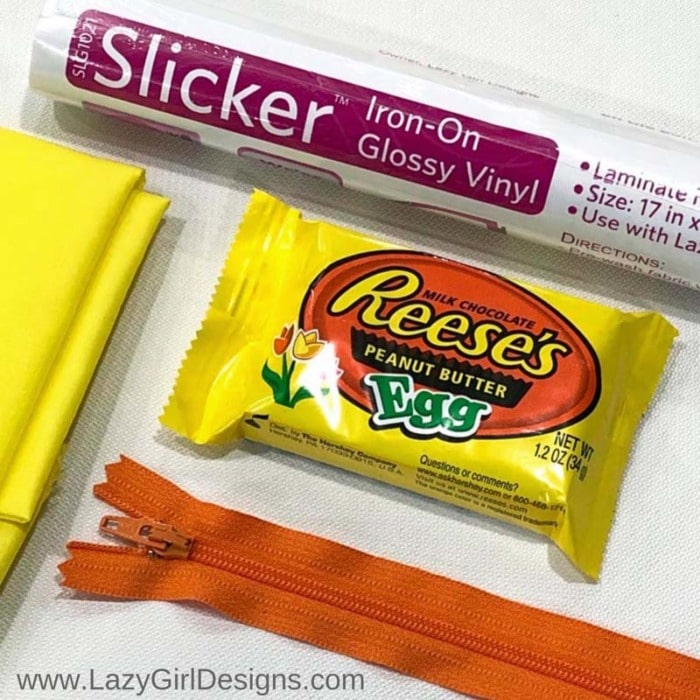
Supplies to Make Candy Wrapper Zipper Pouch
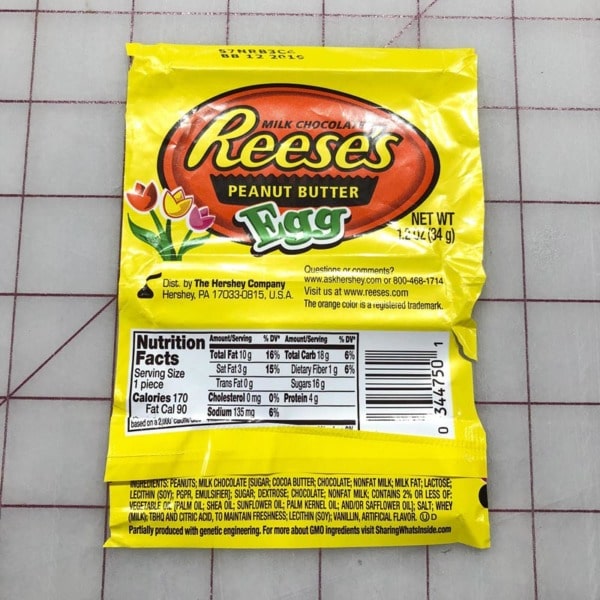
Reese’s peanut butter Easter eggs are just the right size to make small coin-sized zippered pouches. Inspect the wrapper before buying to make sure it isn’t damaged or wrinkled at the seals.
This post contains affiliate links. I make a commission when you order items through those links.
- Candy of choice, buy extra in case a wrapper rips upon opening
- Slicker Iron-On Glossy Vinyl SLG1021 by Lazy Girl Designs
- Coordinating zipper, 14” or longer
- Ripstop nylon fabric same size as candy wrapper
- Double sided sewing tape or sewing clips (pins will leave holes)
- Coordinating thread
More grocery store projects: Candy Wrapper Key Fobs, No Sew Duct Tape Zip Bags, and Hair Band Cases
1. Open and Clean the Candy Wrappers
Two options for opening the wrapper are to pull apart at the sealed edges or cut the sealed edges off. Pull apart where the back and side seals meet – like opening a bag of chips – to have more usable wrapper. The wrapper can tear easily, so go slow. The wrapper can survive a small tear, but I had some whoppers.
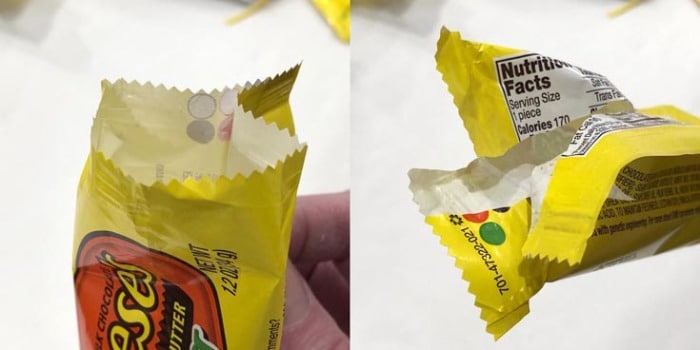
Otherwise, cut off both sealed ends close to where the edge is sealed in order to preserve as much wrapper as possible. Remove the candy and wash/rinse the inside of the wrapper. You’ll have less wrapper to work with, but it’s still enough.
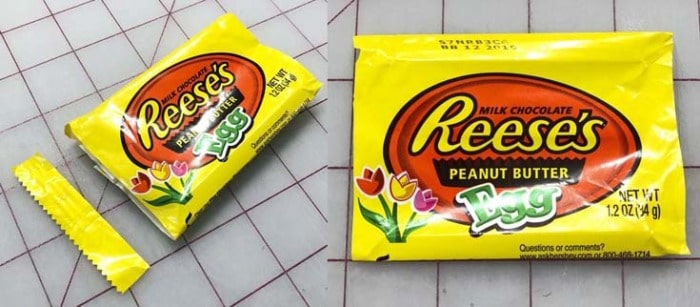
2. Cut the Candy Wrapper Open
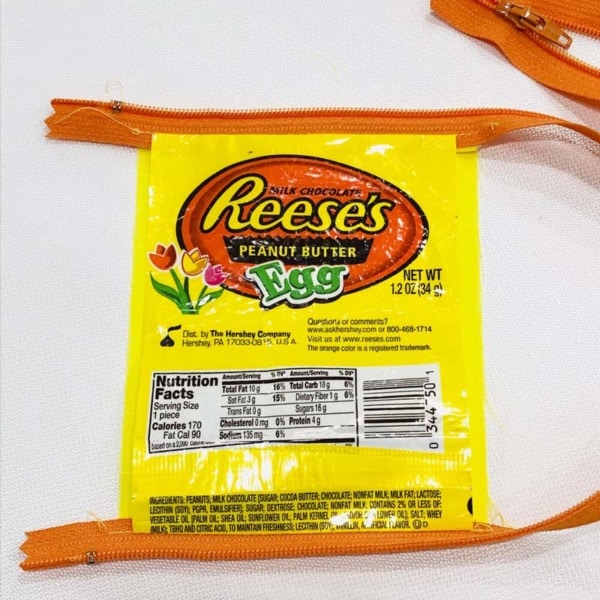
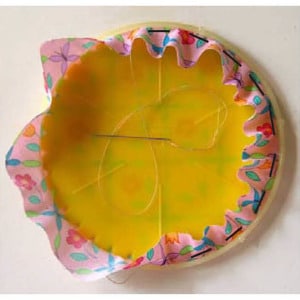
Cut across the top of the candy wrapper about 1/2” above the Reese’s orange egg. That will create a little space between the zipper and the egg graphic on the finished project.
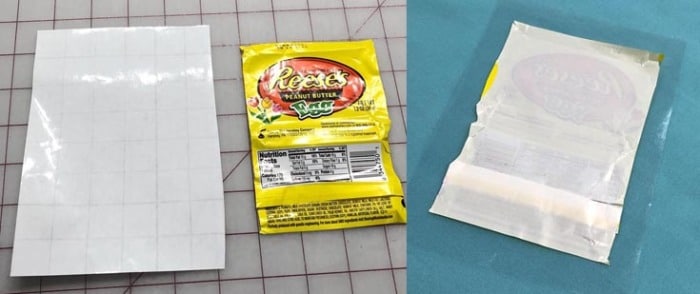
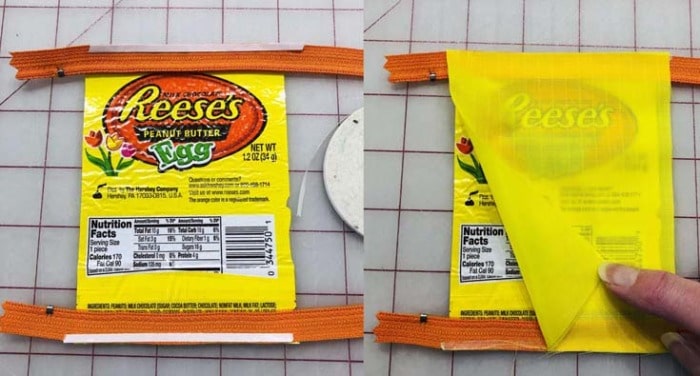
3. Add Slicker Iron-On Glossy Vinyl to Reinforce Candy Wrapper
- Cut a piece of Slicker slightly larger than the candy wrapper.
- Peel the paper backing and set aside for now.
- Place the Slicker face down with the sticky side facing up.
- Place the candy wrapper face down on top of the Slicker.
- Smooth flat with your finger, working out air bubbles.
- Shown on dark fabric to make the Slicker easier to see.

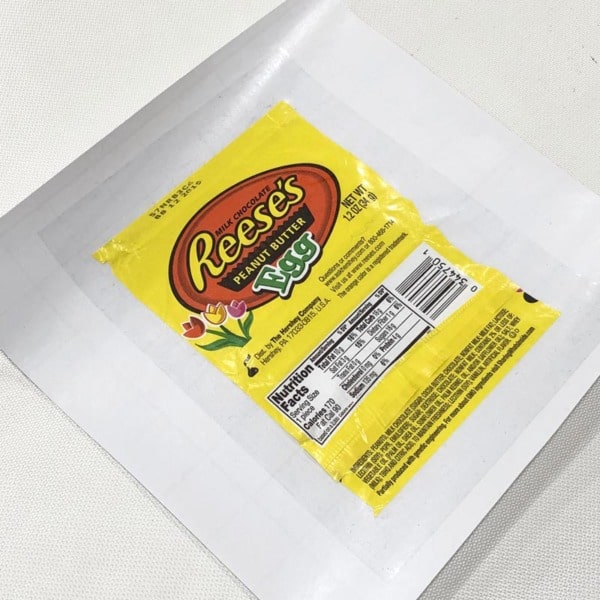
4. Fuse Slicker to the Candy Wrapper
- Place the wrapper/Slicker with wrapper facing up on top of a piece of paper to protect your pressing surface.
- Use the paper backing from Slicker as a press cloth and place it with the shiny side down on top of the Slicker/wrapper.
- Follow fusing directions to fuse Slicker to the wrapper.
- Let cool, then remove pressing paper and set aside for later.
- Trim at the candy wrapper edges.
More info about using Slicker to Laminate Fabric here.
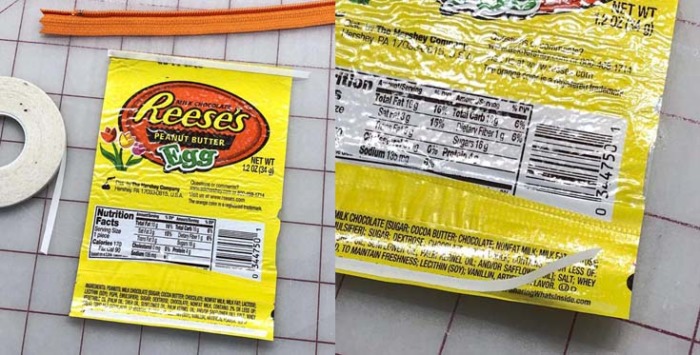
5. Add Double Sided Sewing Tape
Double sided sewing tape is a helping hand for tasks like holding the zipper in place and it can be sewn through without gumming up the needle. Use it in place of pins or clips. The tape comes in different widths of 1/8″, 1/4″, and 1/2″. I like the 1/8″ for this application. Wider tape can be cut to make it narrower.
- Place a strip of the double sided sewing tape on the top and bottom edges of the wrapper.
- Peel the paper backing.
- Pins will leave a hole in the wrapper so use clips if you are’t using tape.

6. Position Zipper and Lining Fabric For Sewing
Use these tips and tricks on all of your zipper projects.
- Unzip the zipper and turn it over so the teeth are facing down.
- Place the zipper on top of the tape.
- Match the fabric edges of the zipper to the wrapper edges.
- Add a strip of double sided adhesive tape on the edges of the zipper.
- Place the lining fabric on top of the zipper, match edges.
- The sewing tape will hold all of the layers together for stitching.
TIP: Although the project is just a few inches long, the extra length of a longer zipper will allow the project to lay flat during construction.
7. Tricks to Sew the Zipper to the Project
This is one of my favorite tricks! Use it where ever you can. Check out the video demos to see how I sew a zipper in using a regular presser foot.
- Use a standard presser foot.
- Set the stitch length to 3.0
- A shorter stitch might perforate the candy wrapper and allow it to rip or tear.
- Stitch using a 1/4″ seam allowance.
Video #1: Stitch next to the zipper at the top and bottom of the project.
Turn the project right side out. You can stop here or use my sewing tip in the next video to add a line of topstitching near the zipper to hold all of the layers together.
Video #2: Topstitch next to the zipper to secure all layers.
Use these sewing tips and trade secrets for installing a zipper on my bag patterns Sweetpea Pods, Becca Bags, and accessory Fobio Key Fob.
8. Stitch the Candy Wrapper Zipper Pouch Side Seams
- Slide the zipper pull to the middle of the project with the wrapper facing in.
- Flatten the project with the zipper at the top.
- Pin through the zipper to help it stay folded and lay flat for stitching.
- Stitch along both side edges toward the zipper.
- Take your time and gently stitch over the zipper.
- Trim the seam allowances, cutting off the extra zipper length.
- Zigzag stitch the seam allowances to prevent fraying.
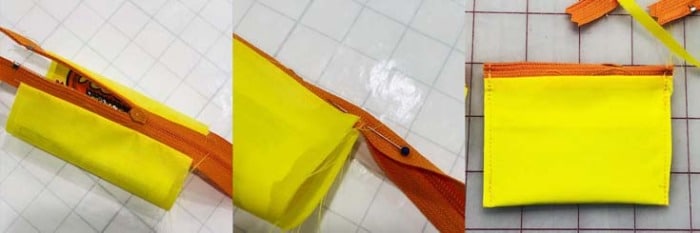
9. Finish Candy Wrapper Zipper Pouch
The final step is to turn this project right side out and that might seem difficult due to its small size and the materials used, so just take your time.
- Turn the zippered pouch right side out.
- It’s tiny and can be challenging, just take your time.
- Push the corners out.
- Push the corner at the closed end of the zipper out, too.
- Slide the pull away from the closed end, reach in and push up/out on the zip ends.
- The Slicker will be crinkled so use the pressing paper and gently press again.
- Add a little ribbon or charm to the zipper pull.
Want To See More?
Follow my Pinterest boards Candy Wrapper Crafts and Quick Craft Projects and Ideas
That’s Pinterest-ing!
Follow me on Pinterest and pin this post to your Pinterest boards.
Subscribe to receive emails for my blog and newsletters about new patterns and project ideas.
Enjoy!
Joan
Joan’s Sewing Group | Pinterest | Instagram | Twitter
Download this Freebie
Enter your email address below to instantly download this freebie now!Like and share this post with your stitchy friends.


Thank you – such a cute pattern. Cannot wait to watch your tutorials and make some.
The pattern looks fun and directions are clear.
You mentioned a video, where do I find this? Thanks.
Hi MaryJo, Thanks for asking. There are two video steps in the middle of the tutorial at step #7 in that post. https://www.lazygirldesigns.com/candy-wrapper-zipper-pouch/
Thank you for the cute pattern!
I learned this trick in a bernina class, but it’s great to see it in pictures so I can remember! Thanks!
Wonderful tutorial and I can’t wait to make this! How would you stitch smaller candy wrappers together to make a larger piece? Thanks!
Hi Ellen, I’m so glad you like the tutorial! This is a great question. Consider getting some double-sided desk tape, like Scotch tape, but sticky on both sides. Overlap the edges and build them up to the size you need.