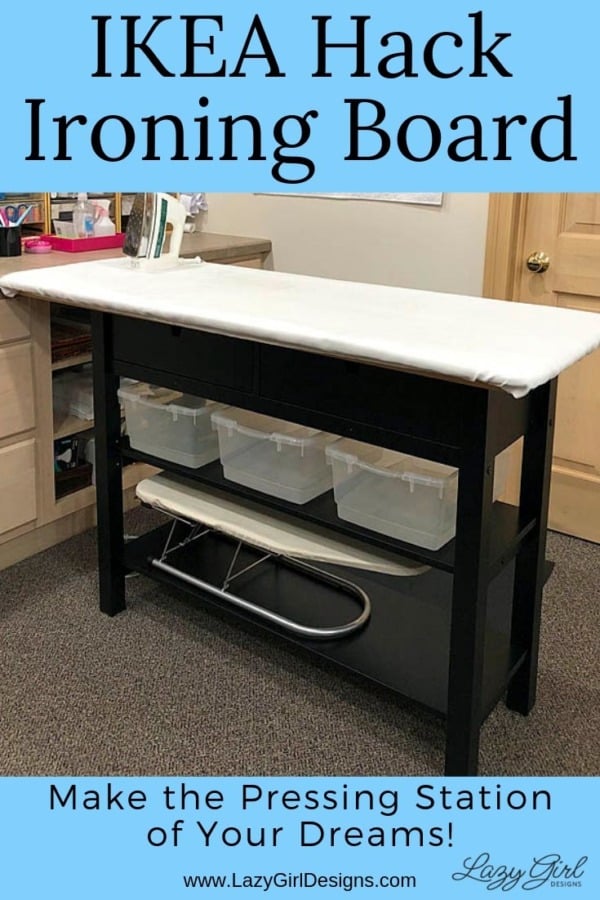
How to Make the Ironing Board of Your Dreams!
Make your dream ironing board and pressing station with this easy IKEA hack.
Lazies, My rickety ironing board was affecting my projects and I needed a better option. I wish I had realized this years ago. Pressing my beautiful projects was a game of tug-o-war, trying to make my sewn project look nice while my ironing board was shifting and moving as I pressed. In this article I’ll show you how to create the ironing board and pressing station of your dreams with this simple IKEA hack! I’ve been sewing since I could reach the ironing board, and I pride myself on my pressing skills. But it never occurred to me that I could have a better pressing station until now.
Watch the Video Tour of IKEA Hack Pressing Station
1. Buy or Make an Ironing Board Topper
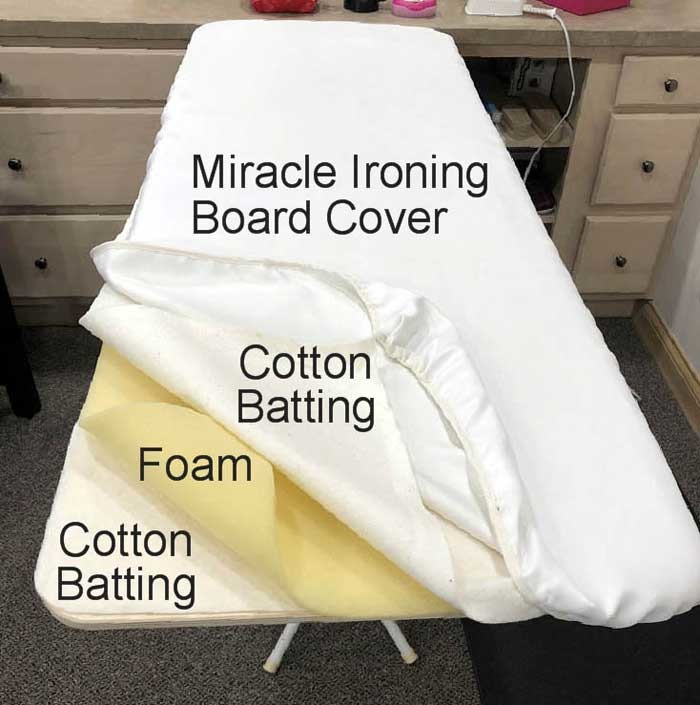
The Big Board is a brand of ironing board topper, shown here leaning against the wall. It’s a 22″ x 59″ plywood base with rounded corners and a lip on the bottom designed to sit on top of a standard ironing board. I like it because it’s great for pressing the large pieces of my bag projects or fabric yardage. The Big Board comes with a cotton cover and cotton batting-like pad, trimmed to fit the board surface.
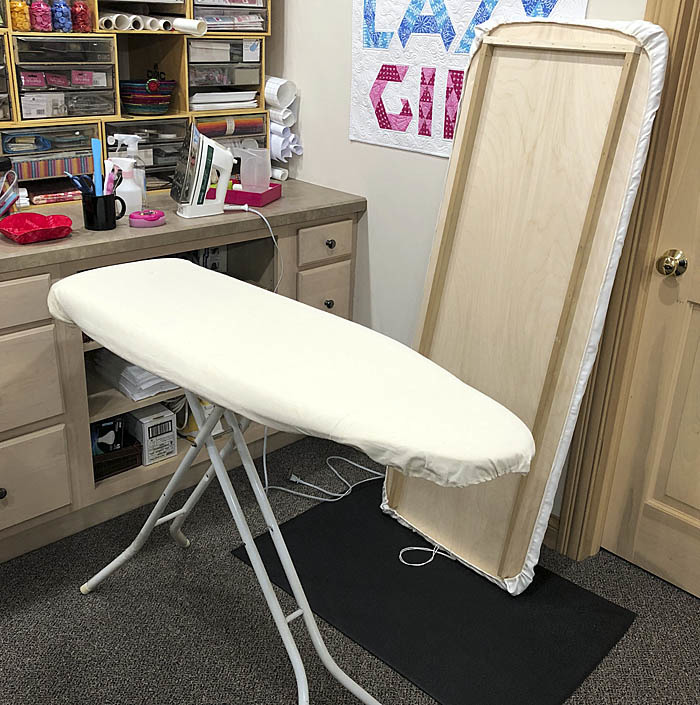
Note: To make an ironing board topper, you’ll need a piece of plywood, some lengths of wood to create a lip on the underside and make a cover/padding. Go to this inspiration blog post for details.
This post contains Amazon affiliate links. I make a commission when you order items through those links.
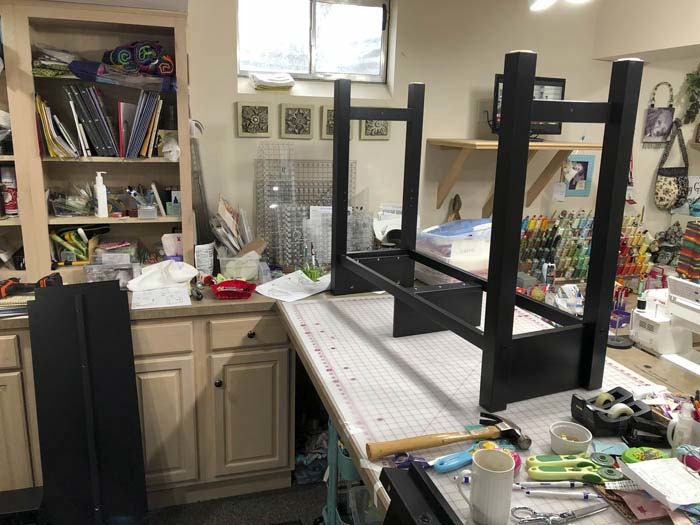
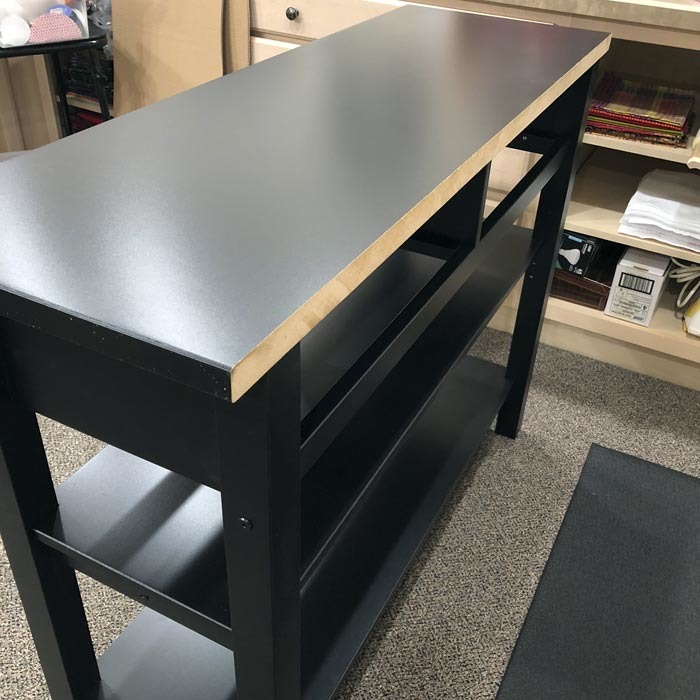
2. Purchase and Assemble IKEA Norden For The Base
The Norden sideboard is a sturdy construction which will provide the stable base for your board topper. The Norden is the right height for work while standing plus it includes shelves and drawers for sewing storage.

Assemble just the base of the Norden and leave the top off for now. Work on an elevated surface for convenience. If you’re an IKEA fan like I am you might spot the teal Raskog tucked under the work table. For more inspiration like this, follow my IKEA Sewing Room Ideas Pinterest board.
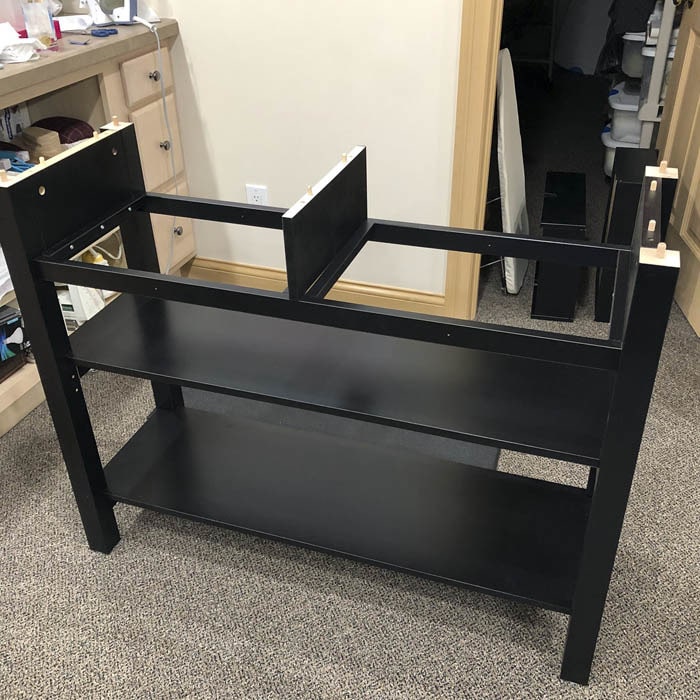
Move the base into place. The bottom shelf is stationary, the other shelf is adjustable. Above that is space for two sliding drawers.
3. How to Modify the IKEA Norden for a Pressing Station
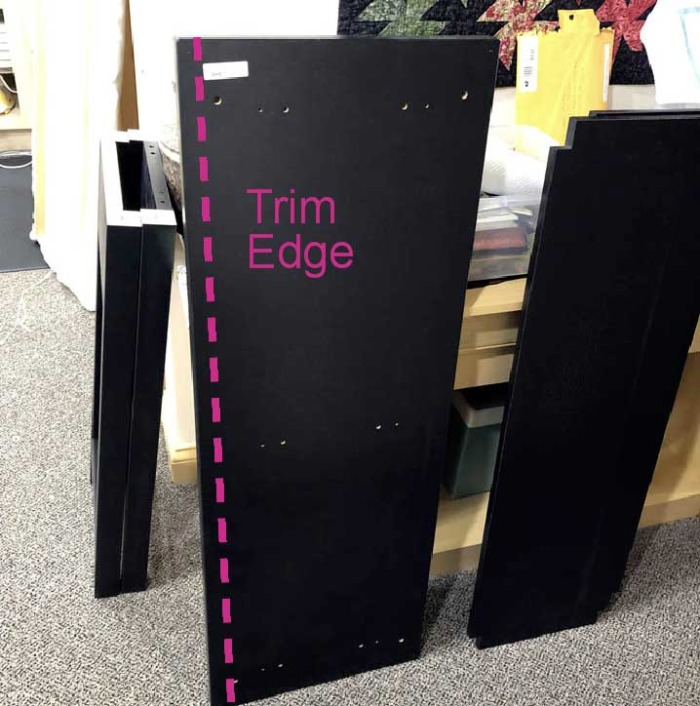
The top of the Norden is 1/2″ too wide to fit inside the 16″ wide lip of my Big Board. Measure the lip of your topper and Norden to confirm. A neighbor with a table saw trimmed the Norden top to size for me – thank you! If needed, check to see if your local Lowe’s and Home Depot offer cutting services.

Trim 1/2″ from one long edge of the Norden top before assembly. Note: You don’t need to trim the top if you build your own plywood topper. Make sure to construct the lip of your topper to fit the Norden.
4. Add a Cover and Padding to the Pressing Surface
I use a fiberglass Miracle Ironing Board Cover. Fiberglass reflects heat back toward your project for more efficient pressing, plus it will not scorch and adhesive resists sticking to it. The Miracle cover comes with a foam layer and I added another layer of cotton batting between the top cover and foam.
Want to improve your pressing skills? Check out my Pressing Tips for Professional Results.
5. Finish Assembling the IKEA Norden Sideboard
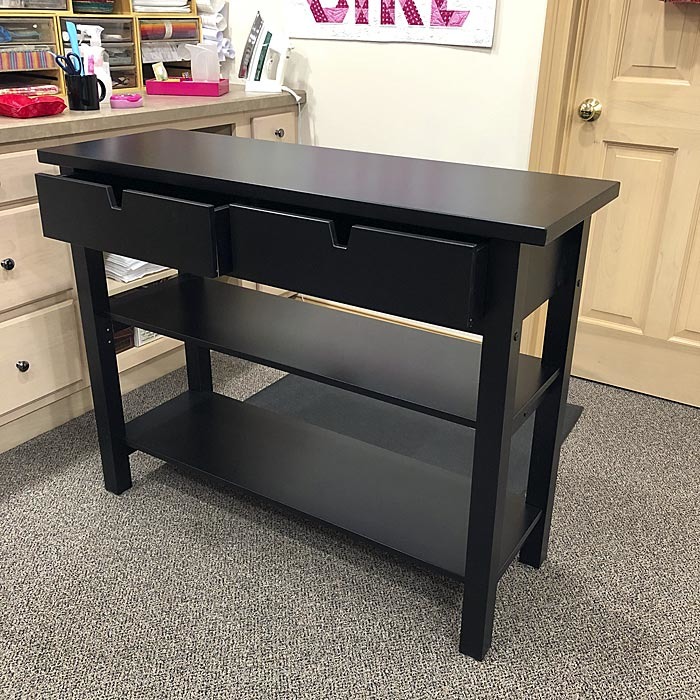
I added the top with the trimmed edge oriented toward my work space. This edge will be covered by the lip of the Big Board topper. The drawers and shelves of the Norden are accessible from both sides, meaning there’s no definite ‘back’ side. If I use this piece for something else, I can paint or put this edge against a wall.
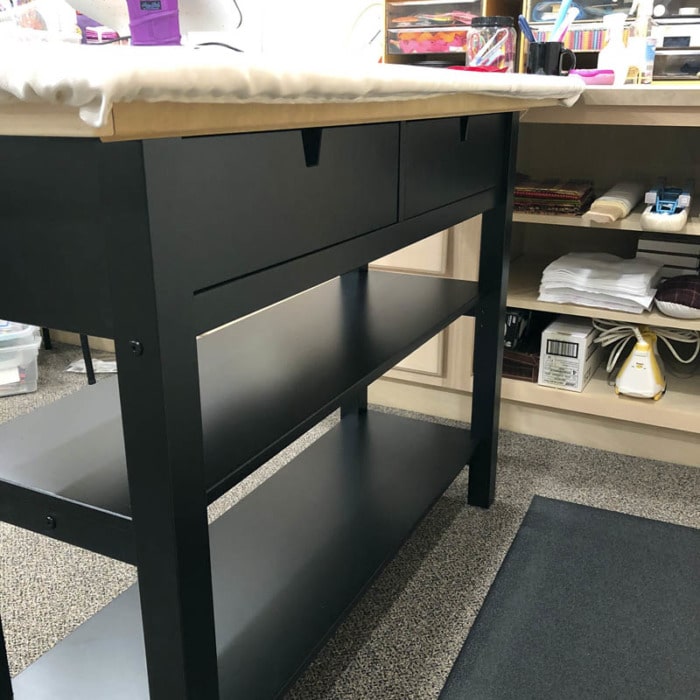
6. Add the Sliding Drawers
The two sliding drawers are roomy and simple. They slide open to both sides so I can access them from either side of the pressing station.
7. Test Fit the Topper For Proper Height
Place your topper on the Norden. Make sure you like the final height of your station and can slide the drawers open.
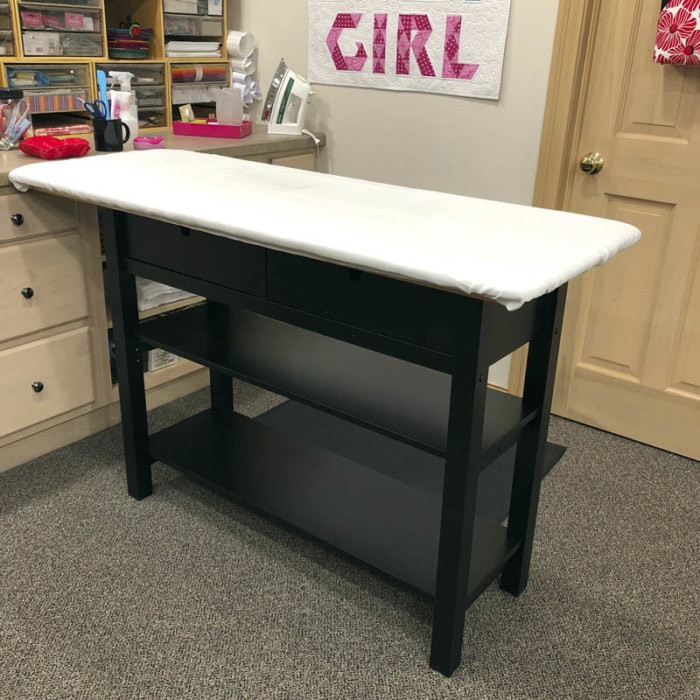
The lip of my Big Board was blocking the drawers so I added a layer of cardboard cut from the IKEA boxes for the perfect height.
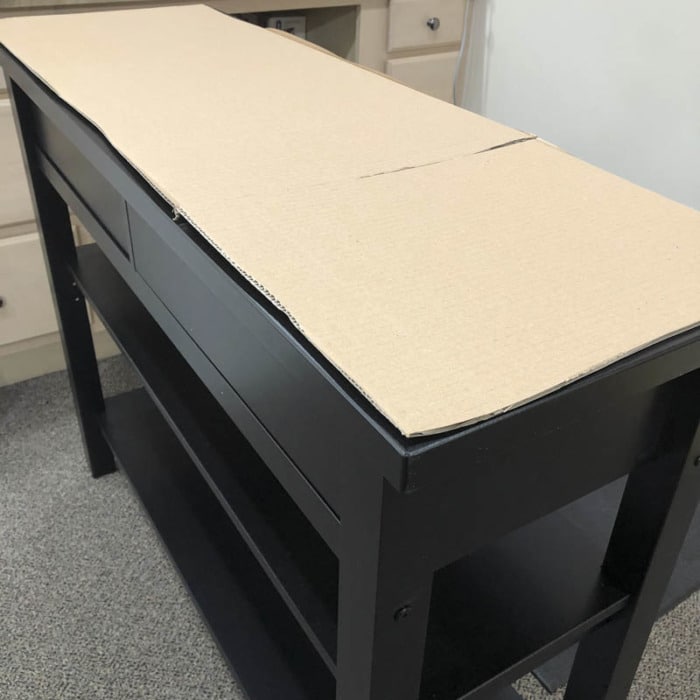
You can just see the top edge of the drawer near the lip under the topper.
8. Comfort and Ergonomics While Pressing
Make sure you have ‘elbow’ room in the work area around your dream pressing station. I moved the new station up against the built-in cabinetry for convenience. Keep enough room between the wall and the station to stand, move around, step back from the board to allow room to hold something up and arrange it for pressing. For more inspiration, follow my Pinterest board: Ironing Board and Pressing Station Ideas
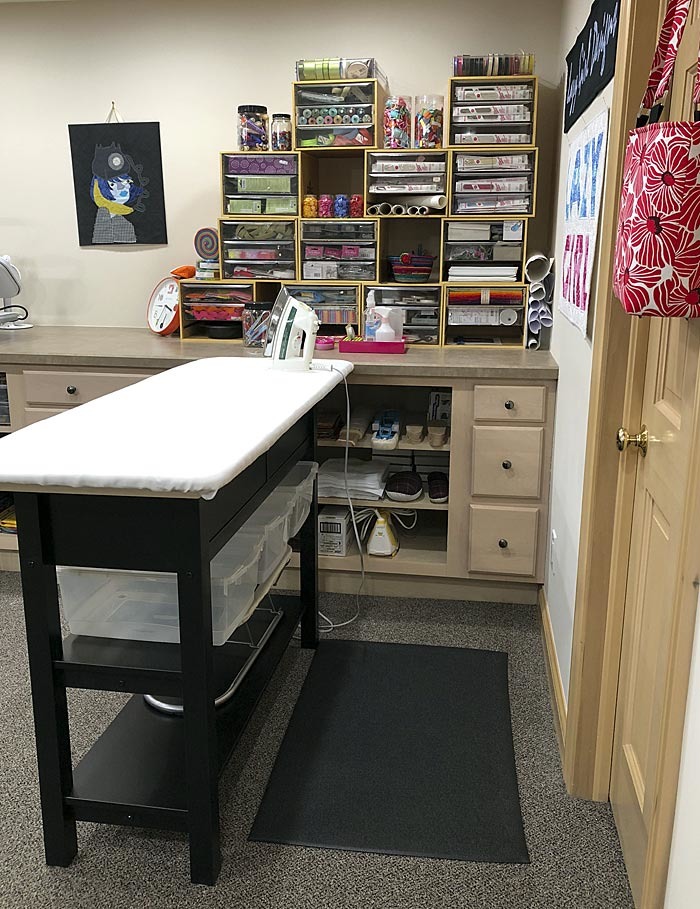
An anti-fatique mat on the floor next to the ironing board offers extra support while pressing. I have another mat in front of my work table, too.
Here’s a good option for an anti-fatique mat:

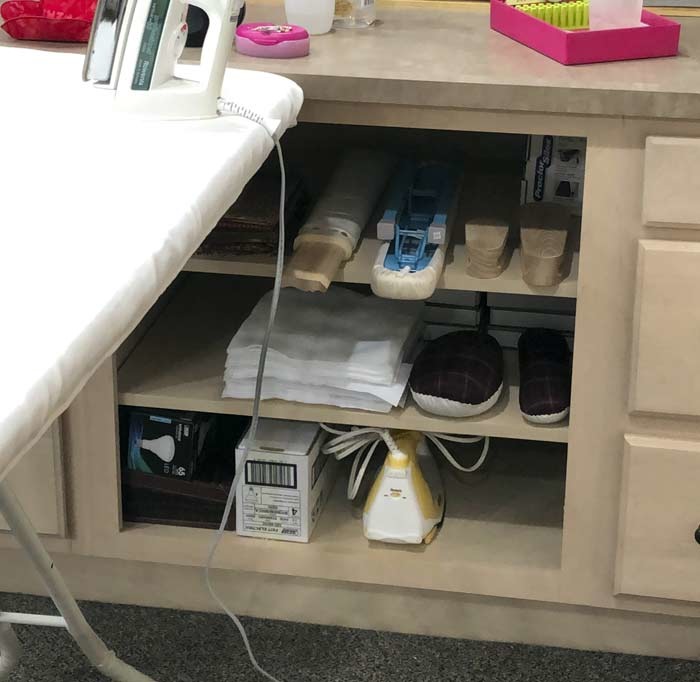
9. Utilize Shelves and Drawers for Sewing Organization
The Norden shelves are perfect storage for my small table top ironing board and a few storage bins. The base of the small board collapses for storage, but I use it regularly, so it’s convenient to leave it set up. Clear storage bins allow me to see what’s in them. For more organization and storage ideas, follow my Pinterest boards Ironing Board and Pressing Station Ideas and Sewing Organization Ideas.
Small bins and table top ironing board.

![]()

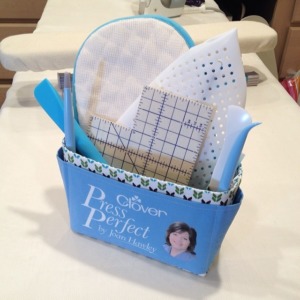
10. Organize Ironing Tools & Pressing Supplies Nearby
Spend some time organizing your new work area to keep your ironing notions and pressing supplies nearby for easy access including:
- Pressing hams
- Wooden clappers
- Small ironing boards
- Extra irons
11. Sewing Supply Organization Ideas
Boxes of clear drawers are stacked and offset to create storage nearby:
- Zippers
- Pressing sheets/cloths
- Buttons
- Thread
- Ribbons
- KAM snaps
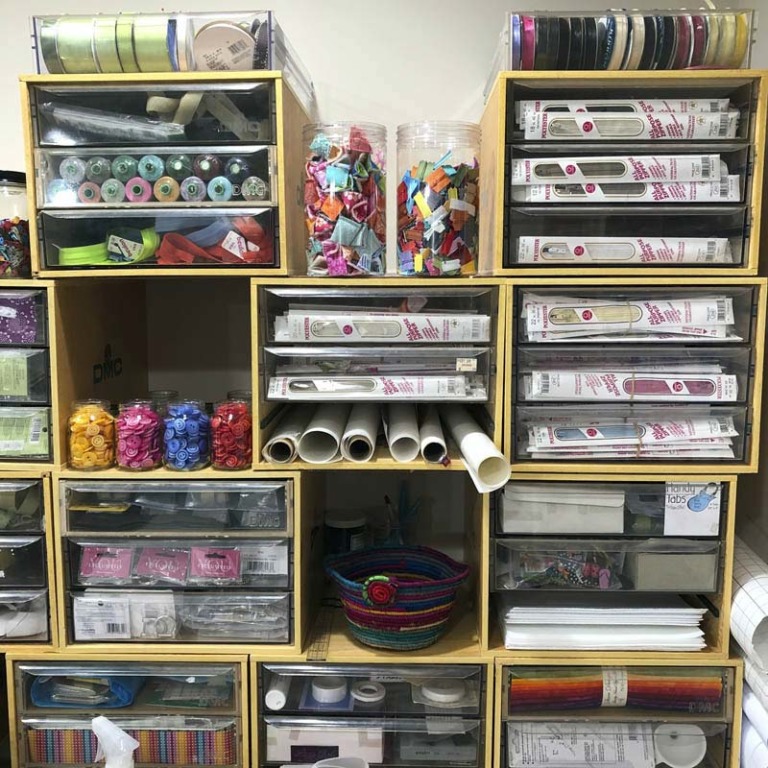 The open areas between boxes work well for large, pretty, or colorful things which brighten my space.
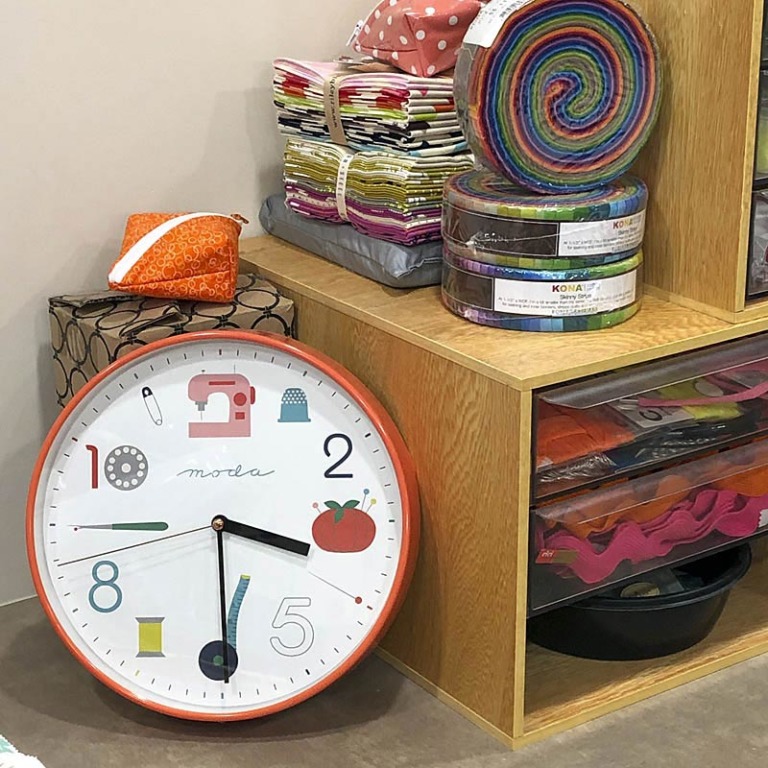
Sewing Decorations in My Studio
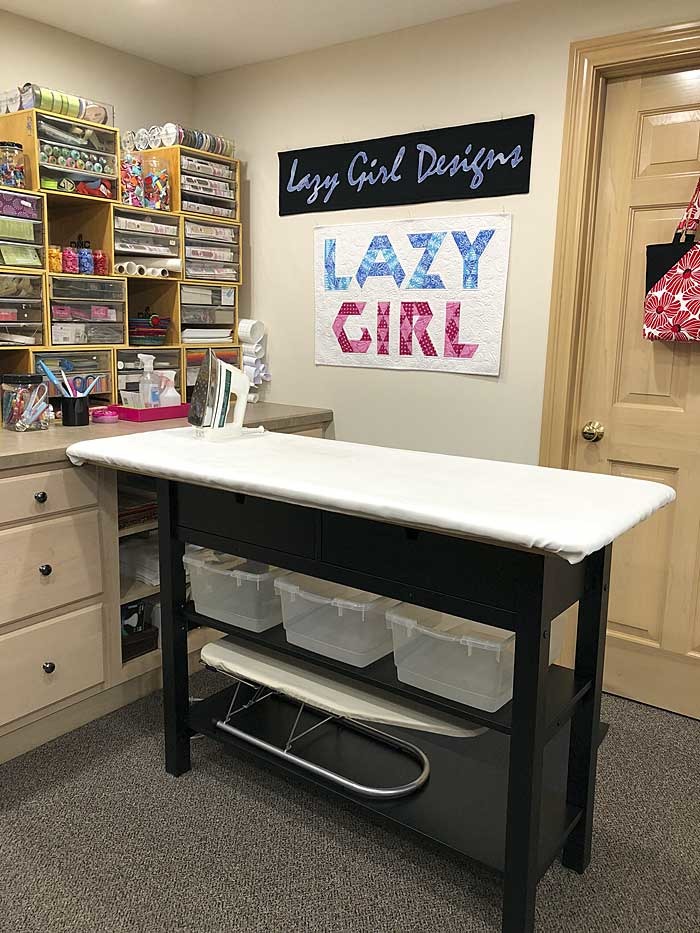
I love having sewing-related decorations in my studio. Here are some cute sewing themed wall clocks. I found this cute clock by Moda is a recent addition which I found it at the Fat Quarter Shop here.
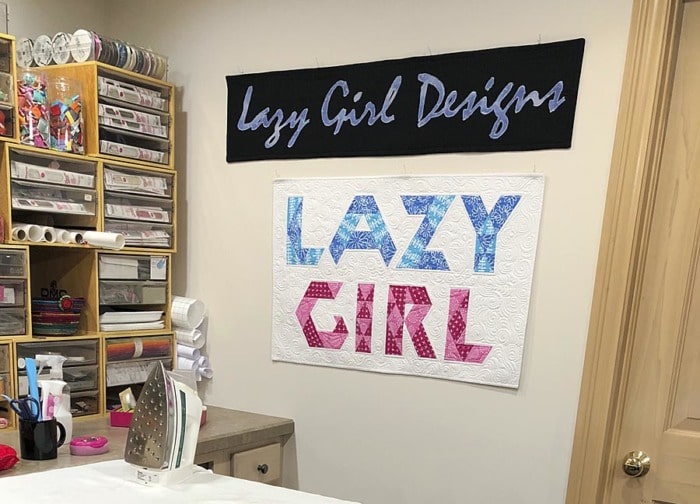
I made the blue and black Lazy Girl sign for my company logo years ago. Below that, Julie Herman of Jaybird Quilts made the Lazy Girl sign using pieced letters from her Alphabet Soup book.
![]() Want To See More – Tour My Whole Sewing Room
Want To See More – Tour My Whole Sewing Room
A corner of my studio is dedicated to my pressing needs. Take a tour of my whole sewing room and craft space and follow my Sewing Room Tours Pinterest board.
Show Me Your Sewing Space!
Share pics of your sewing space in my Facebook Lazy Girl Group
My Top Product Recommendations
For more great finds for your sewing room and craft space, see my list of 11 Must Have Sewing Room Equipment Finds
Follow me on Pinterest and pin this post to your Pinterest boards.
Subscribe to receive emails for my blog and newsletters about new patterns and project ideas.
Enjoy!
Joan
Joan’s Sewing Group | Pinterest | Instagram | Twitter
Like and share this post with your stitchy friends.


I loved this blog post and video! I also have a big board pressing surface on my old ironing board. I might have to try this! Thanks Joan…and it’s great that your studio gets messy too! 😀
Laurie I wish I had done this years ago! Keep me posted if you try this.
Such an awesome idea, Joan! Thanks SEW much!!
Great ideas, Joan. Your storage boxes look like DMC floss boxes. Where did you get so many of them? I got a few when a cross stitch shop I stitched for went out of business. I use mine for perle cotton balls, but I haven’t done cross stitching in quite a few years. I like how you have your zippers and fusibles stored in them.
THANK YOU so much for taking the time to teach us about this!!!
I have used a big board for years — I even made a couple for friends. I never put any trim on the bottom and have had no problem with the big board sliding around and yet I can easily adjust it if I need to. This would eliminate the need of adding cardboard so you can get into the drawers and you wouldn’t have to cut the top of the cabinet.- you get two out of a 4 x 8 sheet! I covered mine with some cotton batting and topped with canvas. Pull to back and use upholstery tacks to nail canvas to board. Love the IKEA cabinet idea – I used an old sofa table.
Where did you get the boxes with clear drawers?
Hi Anna! Those are DMC embroidery floss boxes that I bought from a store that was closing.
In the interest of small sewing spaces…what do you think of also making a removable board for cutting? Of course it would need to be wider to hold a large mat for cutting. The same small table could then be a work space, a cutting board or a pressing board depending upon your need. The tops can be put in a closet of lean against a wall when not being used. Would also consider locking castors so table could be rolled where space is available.
Assemble is option than purchase. Assemble board cover perfect for you. I love the post and also the video.
I love all your ideas for the sewing room. I especially like the drawers you organize your zippers, etc. Where did you get the drawers?
Do you have any issues with steam dissipation with using a wooden board? Does the wood get warped over time or moldy?
I love your designs! The instructions are so easy to follow!