Weave A New Fabric For Your Purse Project
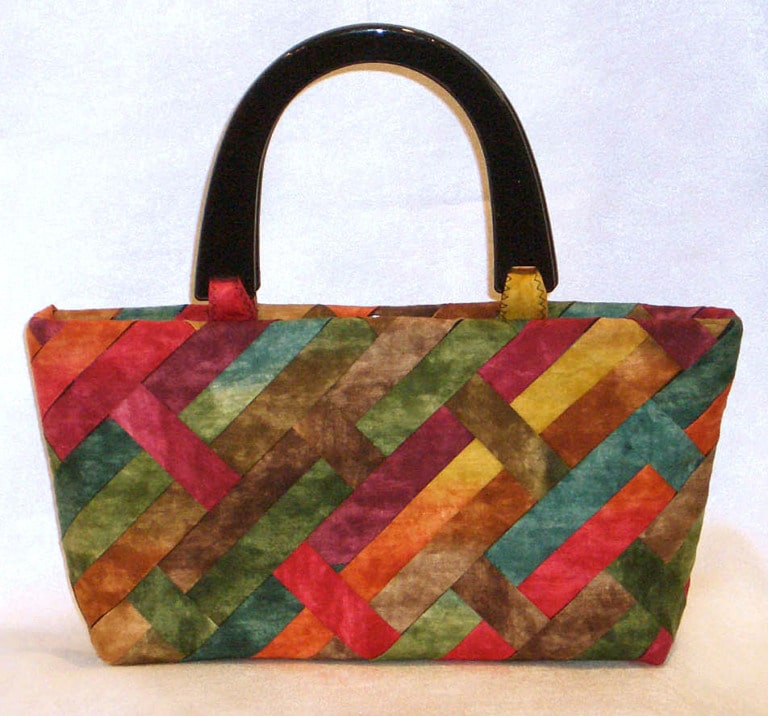
Lazies, This is one of my favorite projects! I used a whole bunch of Clover Needlecraft’s fusible bias tape to pin weave ‘fabric’ for the cover of this purse. Look at those colors! All I did was unroll the packaged bias tape, weave, fuse and go. Very Lazy. Claim the FREE printable tutorial below.
This was so easy to create and could be done with tons of variations so let’s get started.
 Step 1: Choose a Handbag Design
I chose the Chloe Handbag design as my starting point. It’s on the small side, compared to many of our designs, it has simple design lines – no complicated pieces to work around or anything like that. It’s a canvas waiting to be painted. In this case, the paint was fusible bias tape.
Step 2: Choose a Surface Material
Since I had this beautiful 1/2″ wide fusible bias to work with, my grand plan was to create a fabric from the bias strips. Start by weaving the strips, then fuse them to themselves to make them stick together. Next, fuse the strips to a base fabric and cut out the pattern piece from the final fused ‘fabric’.
I’m sorry to say the wide fusible bias tape is no longer available. The narrower variegated bias is still available, just not the 1/2″ wide stuff. However, this overall approach would be fabulous for weaving ribbon, yarn, decorative threads, shoe laces, etc.
Or, use Clover’s Bias Strip Makers to make your own bias strips and secure them by fusing to a piece of fusible interfacing to secure.
While I chose to abut the strips so you can’t see the background or supporting fabric, you can space your strips to allow the fabric to show through. That would be a really nice surface treatment.

I placed a large applique’ pressing sheet on a gridded pressing board and started pinning the bias tape, fusible side down. I chose a weaving pattern of over three, under two. Nothing scientific, but it felt right for the size of the project and the width of the bias tape. Click to enlarge the image above to see the pin detail at the end of each strip.
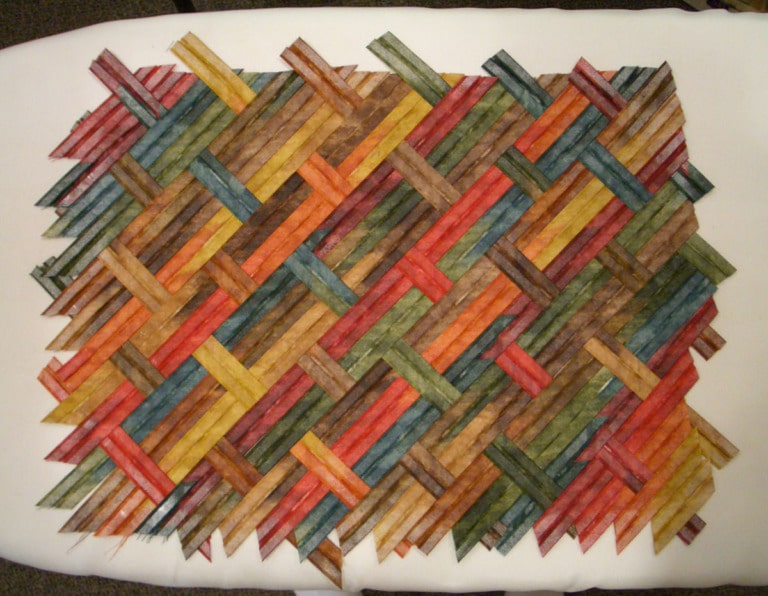
When the weaving was complete, I pressed the whole thing with my iron to make sure the strips fused to each other where they overlapped. Since it was layered on top of an applique’ pressing sheet, the weaving pulled away from the sheet intact. The picture above is what the weaving looked like when I flipped it over and placed it on my ironing board.
Step 3: Complete Your Project As Directed
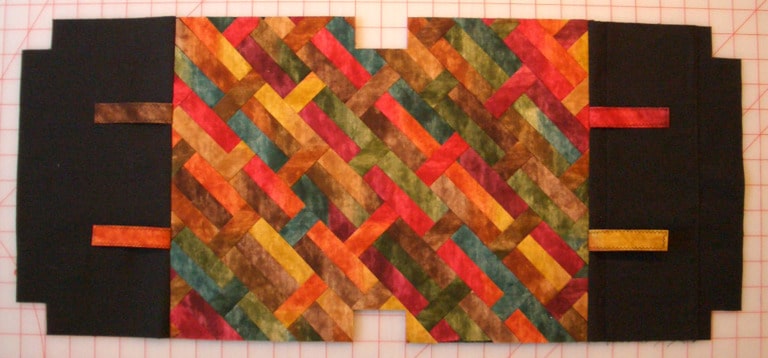
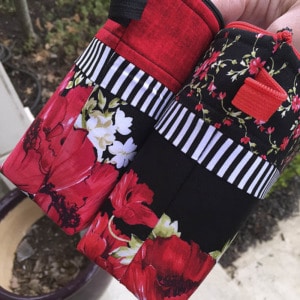
Then I placed a piece of black cotton fabric on top of the weaving and I pressed once again to fuse. From there, I constructed the bag according to the pattern, using the fused weaving as the cover fabric. Below is the next step in the process. The short colorful pieces atop the black toward the sides are the tabs that will be used to attach fashion handles.
Claim the FREE printable tutorial below.
Enjoy!
Joan


This is good. I have a different bias maker which is sew simple called a Bias Buddy by Coming Attractions in Phoenix. By making your own bias, do you need to add fusible like “Steam-A-Seam to each strip or could you weave the strips and then place all on a fusible? I haven’t had time to work this out but does look interesting and promising.
– – – – –
Hi Liz,
If your strips will be abut each other, no gaps or spaces, weave then fuse the whole thing at once. If you will use an open weave pattern, consider using snippets of fusible where the strips cross. Consider other techniques for securing the strips including top stitching along the edges for wide strips or zigzag over narrow strips for items such as fibers.
Joan
Joan, I may be biased, but I think you have some of the most creative ideas in the business!
Oh yes! I love this technique and the Chloe bag looks absolutely gorgeous with the batik colors! In my “biased” opinion this bag is the bomb!
This is really really beautiful! I have made bias strips for Celtic quilting so I should get busy with this one, too! I also make stoles for priests and I am “inspired ” to weave the fabric for the bottom 1/3 for one of those. I can’t wait to start cutting! Happy Stitches everybody! Keep the great ideas coming!
P.S. For my daughter’s 13th birthday, we’re going to have a “design a bag” party for her!
– – – – –
Hi Melissa,
I hope you’ll keep me posted on all of the ways you use these inspirations. It would be fabulous to see where you take these ideas.
Joan
Love the simplicity. One of my daughters has her order in for bags for birthdays and Christmas.
just looked at the ‘Weave a new fabric for your purse project’. I LOVE IT !! You have the very best ideas. I have tons of bias tape i’ve never used, and this will be perfect. Thanks for all the great projects you have. deborah
i just love the patterns you put out there. I just bought the little wonder wallet , your idea’s help me so much on my sewing, i am a new quilter and i love making other sewing items like you put on line. bonnie greenhoe
Hello,
I recently saw a quilt that incorporated blocks made from weaving strips of fabric made into bias – just like your bag.
The only difference was the quilt blocks used 3 distinct fabrics, a dark, a medium, and a light toned/small print (doesn’t work well with dark/bold prints)
and were woven in specific designs to make eye catching, jump of the page 3d grids, shapes and pattern’s.
The lady did tell me the technical name for it all but it eludes me now.
Sadly I haven’t been able to google any further information that remotely resembles what she had done (other than the weaving concept you’ve used for you bag.
If you have any info on the history on the bias weaving or any other related projects, Id really love to know about them. THX
Pingback: Caityquilter.com · Happiness = my Miranda bag!
We did this with our younger children age 8 and 11 (boys) to make gifts (small tea time placemats which we oversewed to lend washablity)& (large change purses) for their grandmothers for Mother’s day and they turned out BEAUTIFUL!!!!
Thanks for the larger size idea we will be trying this for next months craft. Our son is slightly special needs and he finds the time sitting and weaving very therapeutic.
Pingback: Fabric Weaving: Purse Project « Athena Magazine
I’m just learning to weaving on a table top loom. I was surfing looking for ideas, when I stumbled upon your purse and technique. No, it won’t work on my loom, but who cares. This is so cute I am going to have to try it. Thanks. I’ll be linking on Facebook.
I am so glad I found this blog! I spent hours last night trying to play with fabric strips figuring the best way to weave them and how to finish the sides. It never occurred to me to use Bias tape. Thank you!!
Pingback: Mixed Media Embellishments · October meeting
Just discovered your technique and your blog through Pinterest. As a weaver and a sewer, I love it. Thanks for passing on a great tutorial. I am looking forward to your future posts.
I am going to try this with straight strips I cut myself…. I have a wonderful new yard of striped batiks with all kinds of amazing colors. Won’t that be pretty in this bag idea–woven???!!!!
I know I’ll have to fuse the whole thing on fusible interfacing, but it will be worth it.
What an excellent project and inspiration for many other projects. I’m seeing my long scraps weaved into placemats, mug rugs, etc….
Thank you, once again, for your fantastic ideas. Sometimes it’s good to be a “lazy girl”!
Mary
From Brazil…congratulations…..Estava procurando tecelagem com fitas (to screeen, panel,,frames,boards etc…)and I find you…So cute…easy…but very laborious…..