Easy Tips for How to Manage Multiple Sewing Projects
Sewing tips for project management when making several items at a time.
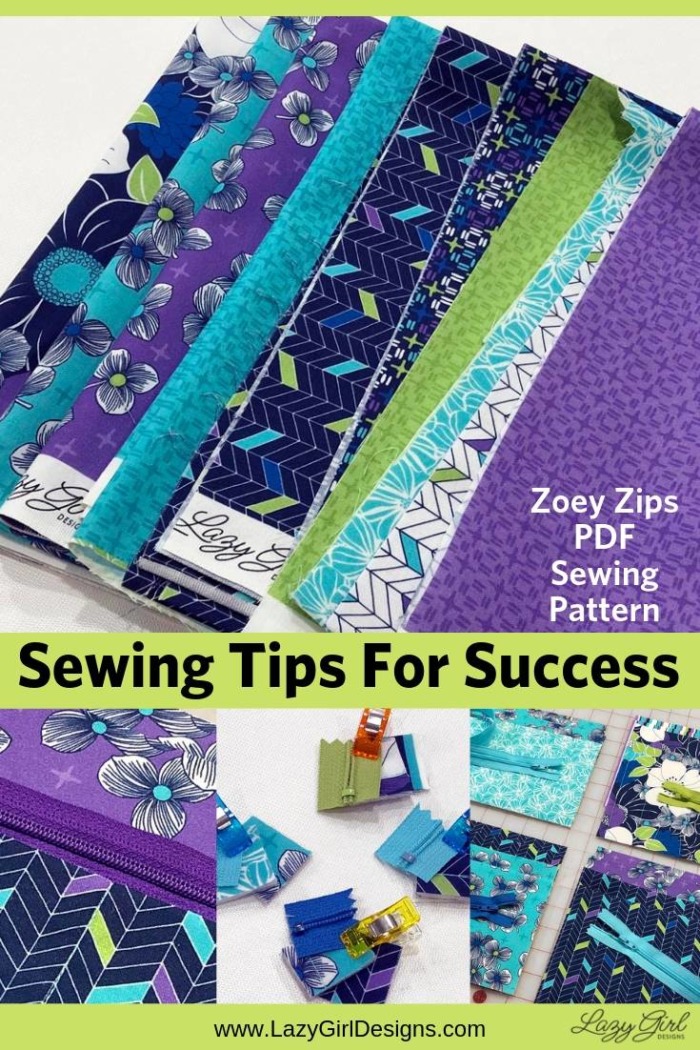
Lazies, It can be overwhelming to make an ensemble of items and keep all the bits and pieces organized. When making a group of things that I intend to use together, like these small zip pouches to use inside my luggage, it feels like I have tons of fabrics to choose from, a zoo of zips calling to me, and a pantry of thread looking to come out and play. How do I choose materials and then manage all of this? You’ll be surprised how easy my tips are for navigating these stitchy waters for smooth sewing from start to finish. Grab your handy printable below.
When you can’t decide on one, make a coordinated group of items. Zoey Zips pattern LGD146
Tip 1: Don’t Choose – Use (Them All)
It can be hard to choose fabrics when you love a whole collection and your project only uses two fabrics. So why not make a bunch of items and use lots of fabrics. Or cut and piece strips to create the piece needed for one project.
Arrange fabrics so you can see a little of each to help pick pieces for projects or mimic strips pieced together. This is the ‘Lexi’ curated fabric collection I designed for QT Fabrics. I love all of these, they all go together, and I want to work with as many as I can.

Fabrics are ‘Lexi’ by Joan Hawley for QT Fabrics.
Tip 2: Pre-Sort, Just Like The Laundry (Only More Fun)
Start by picking all of the fabrics you like and then pull together all of the zippers that work with your fabrics. This might be one collection of fabric or several different collections. Do some preliminary sorting and pair your fabrics into smaller groups of 2-4 pieces. This doesn’t have to be final. It’s just a technique to generate ideas and get started.
Tip 3: Picture Perfect
Use your phone (or camera) to take a picture of your fabric and zipper groupings. Somehow, seeing the fabric and zips through a camera lens is like looking at things with a different set of eyes. It helps me see things more clearly and might help in making selections for the projects. Then review the pictures and use what you see to pare down your options. If needed, repeat the process to pare down further.
Tip 4: Consider The Zipper As A Fabric
The actual fabrics are not the whole story. Since the zippers on these Zoey Zips bags are exposed and you can see the teeth and a bit of the zipper fabric tape, that makes the zipper a ‘material’, so the zipper is a third fabric for each bag.
Below we have fabric groupings with zippers that blend, coordinate, or contrast. Some act as an accent, such as the mossy green. Others work to support a monochromatic color scheme such as the light blues. I wanted the purple to work, but it’s visually too heavy or strong for this ensemble.
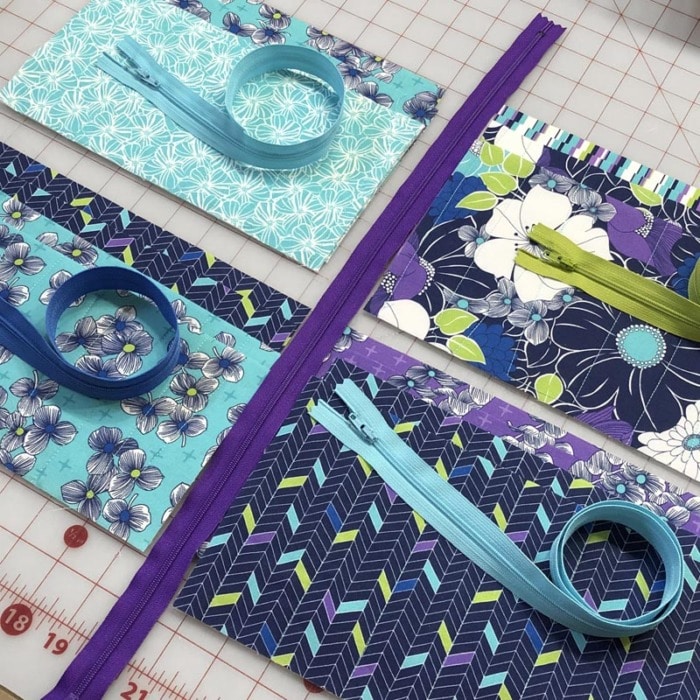
Arrange fabrics and zippers (and any other supplies like thread) to get an idea of what you want to use for each project.
Tip 5: Know Before You Sew: Audition Zippers
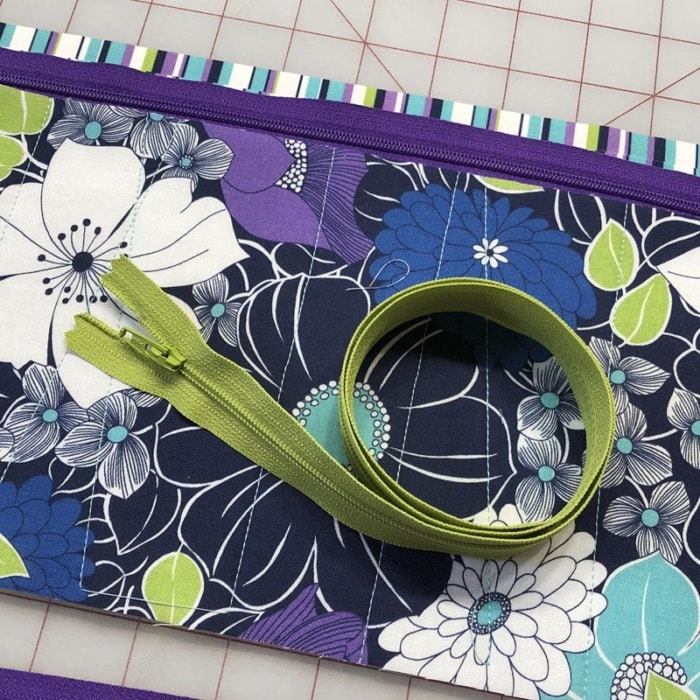
Overlap the fabric onto the zipper so it covers a bit of the zipper fabric edge to get a feel for how much of the zipper will show on the final project. You can see all of the light blue zip and that’s misleading, giving an incorrect representation of how impactful the zip will be. The green and purple zips are tucked under the edge of the fabric and that forces a trick I love to use – that’s Tip 5a below.
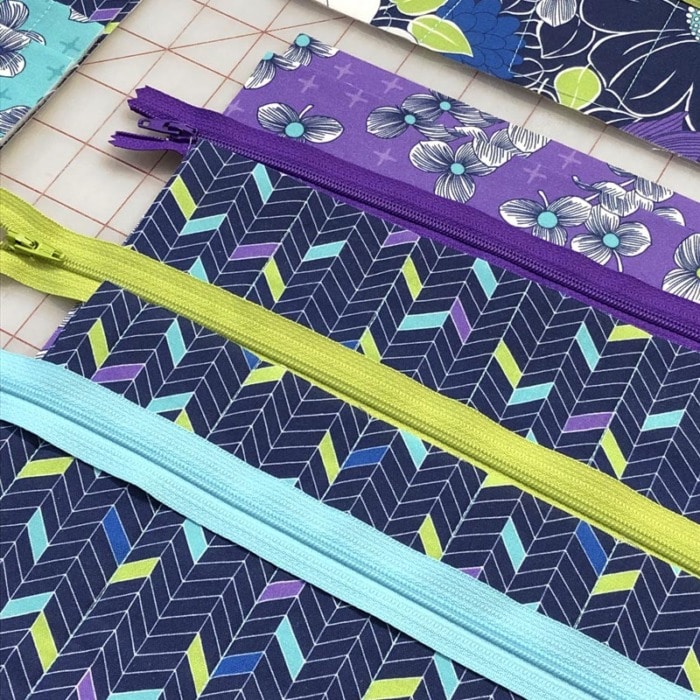
When you can’t decide, audition by placing the edge of the zipper under the fabric to mimic the scale and proportion of what will show on the final project.
Tip 5a: Focus On The Zipper Teeth
Take another look at the zipper audition below. Because of how the blue zipper is positioned, I focus on where the edge of the zipper tape meets the navy fabric. Now look at the green zipper. Because the edge is tucked under the fabric, I focus on the zipper teeth. And the zipper teeth are a different color – kind of.
There are three parts of a zipper you can use for matching: the fabric tape, zipper teeth, and zipper pull. This might be more than you ever wanted to know about zippers, but it’s good to know all three of these things to make the most of your sewing projects.
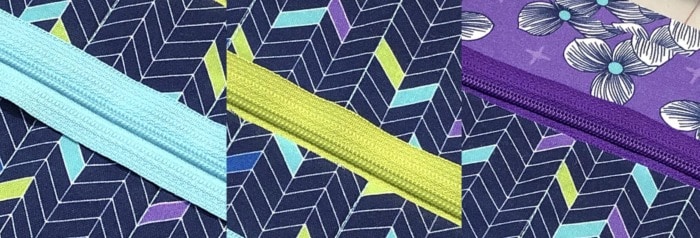
Don’t look at the color of the zipper fabric tape; look at the color of the zipper teeth for the best match.
The fabric is one color. The teeth are the same color, but – because they are three dimensional and have nooks and crannies, the zipper teeth capture light differently and appear slightly different than the fabric edge.
The zipper pull is a whole different animal altogether. The zipper pull is metal, coated and sealed with a color that can be slightly different than the teeth and tape. Frankly, a lot is going on here.
For more about choosing zippers with a purpose, check out How To Choose The Best Zipper Colors For Your Project
When you can’t decide, audition the pieces as they’ll look on the finished project. You’ll see just a bit of the lining fabric next to the zipper, so expose just a bit of that. The purple zipper falls flat and I want the zip to pop. This exercise allows me to see how it will look before completely making the project and possibly being disappointed.
Follow my Pinterest board: Zipper Ideas and Zipper Projects.
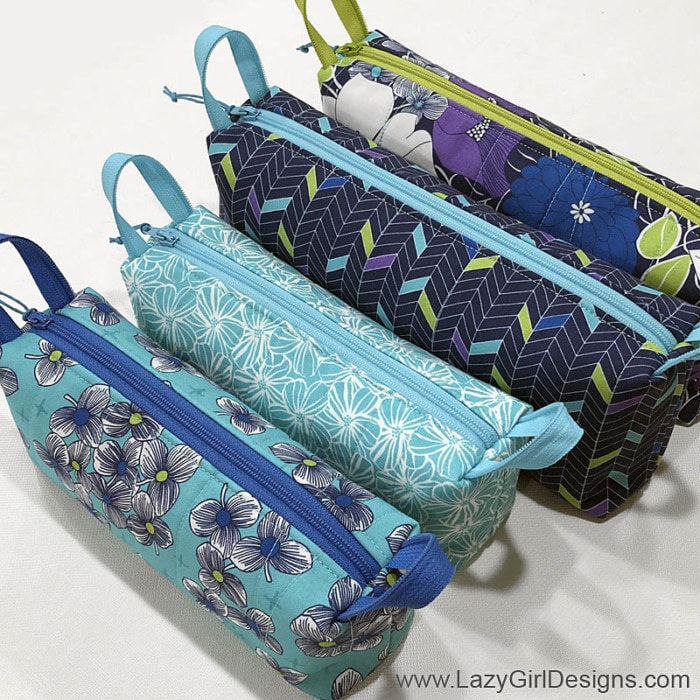
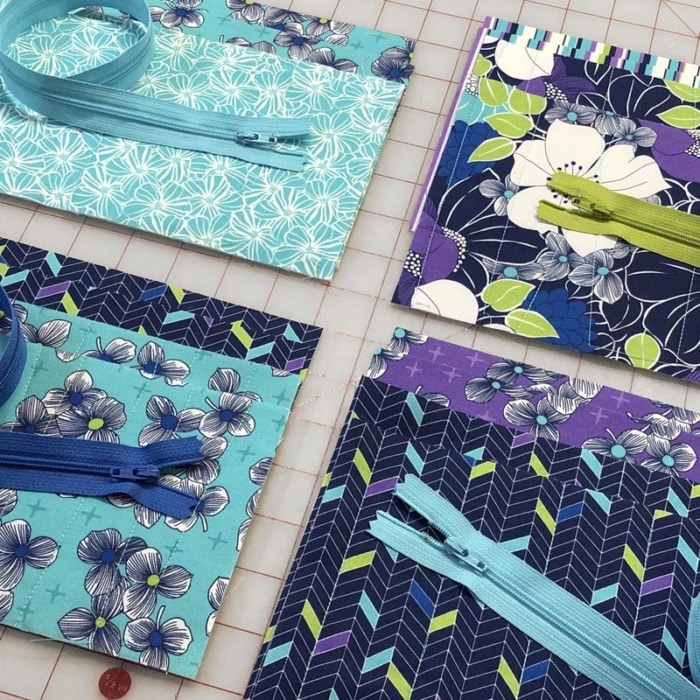
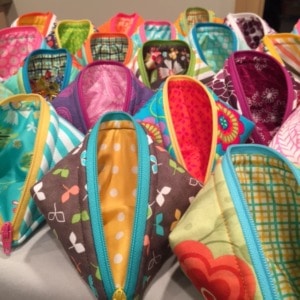
Shown below is my final collection of groupings. I’m making four Zoey Zips at the same time. Selections for these projects include seven fabrics and three zipper colors for four bags.
Each bag has two outside and two lining pieces plus a zipper. That’s a lot to manage and keep organized during construction.
Arrange your project pieces then take a picture with your phone or camera.
Use tip 3a again and take a picture with your phone or camera to refer to while working.
This post contains affiliate links. I make a commission when you order items through those links.
Need zippers? I recommend the YKK brand. Here’s more Zipper info and where to order.
Tip 6: Make Swatch Collections For Each Item
For this project, each fabric piece has corners cut out, so I’ll use those for my fabric swatches. Otherwise, cut samples from leftover fabrics.
For a zipper ‘swatch’ cut a little of the extra zipper fabric tape past the top or bottom stoppers. You don’t need much – just enough to identify the zipper. In this case, the bottom of the zip is cut off, so use that as the swatch.
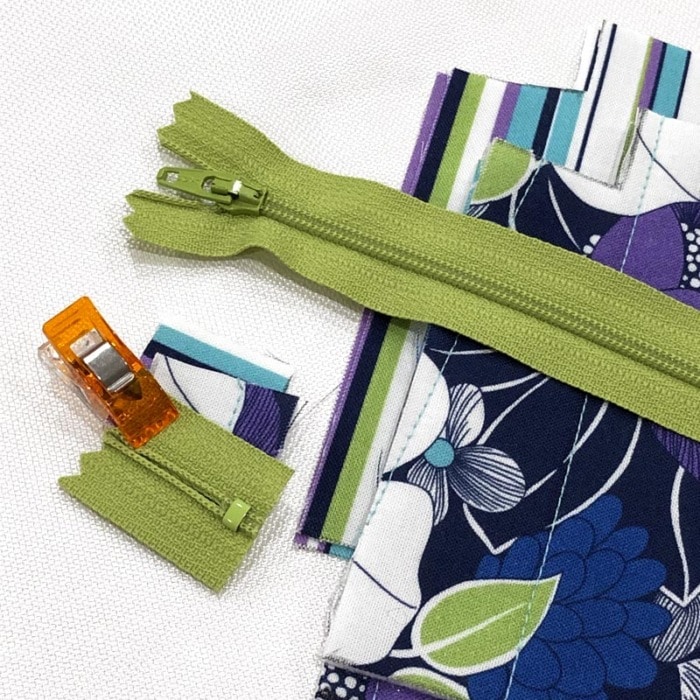
Assemble swatch sets to keep the pieces organized during construction.
New to installing zippers? See how easy it is to install a zipper in our Runaround Bag.
Pin or use sewing clips to hold the swatch sets together. Add a note or tag about the interfacing and fleece used. Other options are to tape or staple swatches to paper and the paper can be filed away with the pattern as a reference to use when you make the project again.
Here we are, we have all of the little swatch sets made up and ready to help us along the way.
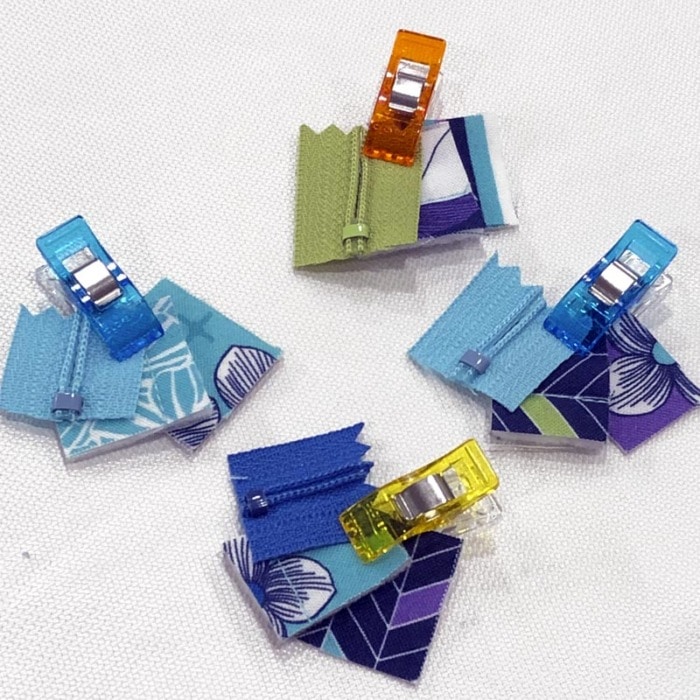
Hold swatch sets together with sewing clips, pins, staples, sew them together, or attach to a piece of paper or note card. Keep the paper or note card with the pattern for future project references.
Tip 7: How To Choose Thread
To audition thread, unwind a bit of each color and lay it across the fabrics. Stand back and see what works best. Try to choose a thread that works with all of the fabrics and zippers. Using a single thread will allow you to assembly-line sew parts of each project. And the thread literally becomes a unifying thread across all of the bags in this group.
I selected an aqua thread (shown in the swatches above) that looks good on all of the fabrics.
Part of what makes this work is that all of the thread is on the fabric, not on the zipper and in that sense, the thread is an embellishment on the fabric.
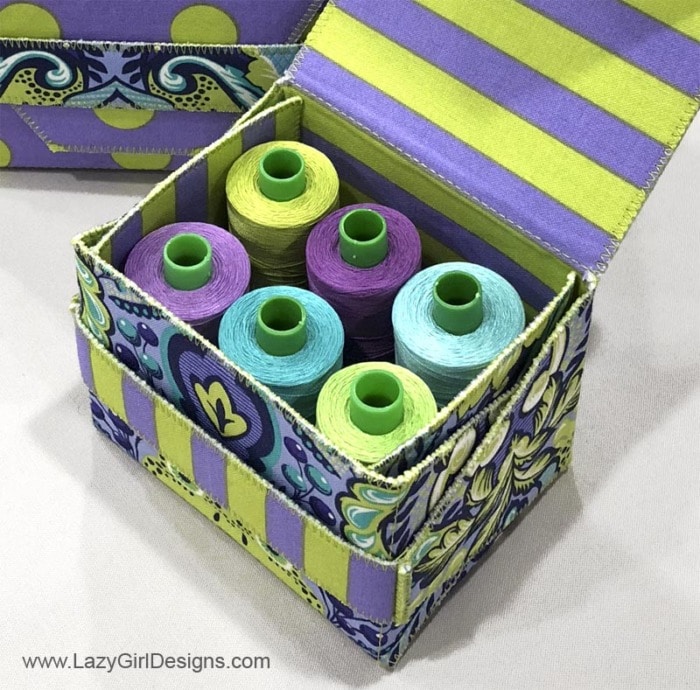
Sewing Tip: Don’t forget to audition thread! Try all the colors and see what works for all items — shown in our Gertie Gift Boxes LGD 144.
I could have selected a color to coordinate with each zipper or fabric and that would have worked. However, I want to make these by assembly line, sewing all of them at the same time, doing one step on each at a time. Using one thread saves me from switching thread colors while sewing. That’s a time saver, and it keeps me from getting my thread colors mixed up, too.
If using several thread colors, be sure to add the thread to your swatch sets to keep that organized, too.
Tip 8: Use A Unifying Element On All Items
Did you notice the waxed cotton cording on the zipper pulls? The little bit of cording on the zipper pull is another opportunity to support a color scheme and or add a unifying element across all items in the collection.
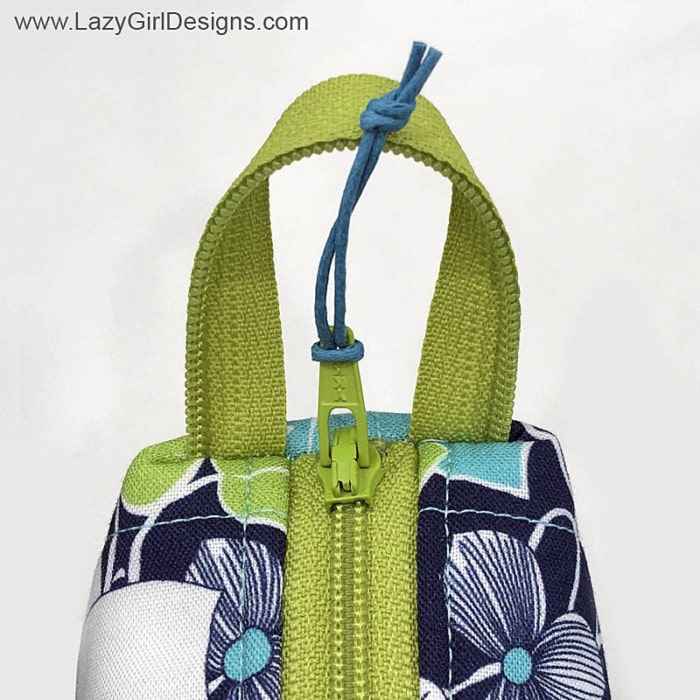
Add a bit of cotton cording, a ribbon, yarn or charm to the zipper pull.
And notice the zipper color. The green isn’t a perfect match with the feature fabric, and the zipper pull color is slightly different than the zipper teeth. But it all works.
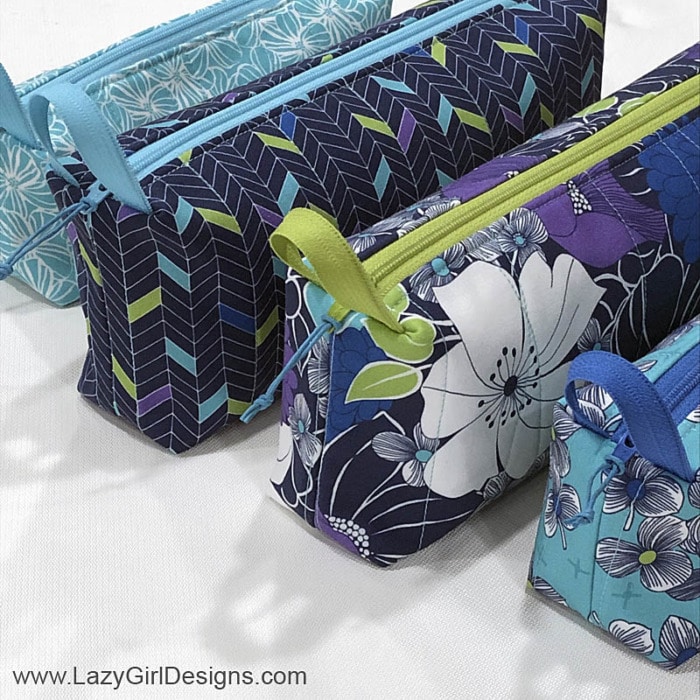
Ta-Done!
Here’s our finished group of beauties! Construction was easy to manage because I used easy sewing tips to select, organize, and manage my work from start to finish. The group coordinates beautifully. All the fabrics and zips talk to each other and play well together.
Get Your Printable Easy Sewing Tips
Click below to get the printable list of all 8 Sewing Tips and use this collection of easy sewing tips to help select, prepare, and manage all of your sewing projects.
Make Some Zoey Zips
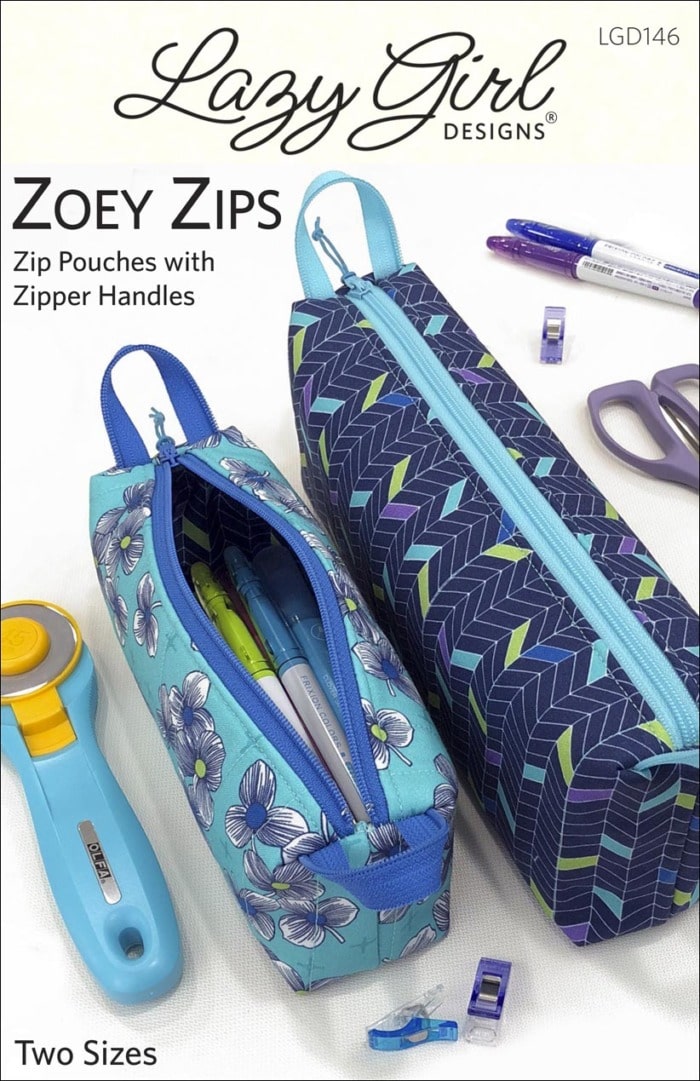
Get the Zoey Zips pattern here and make a whole family of bags to enjoy.

That’s Pinterest-ing!
Follow me on Pinterest and pin this post to your Pinterest boards.
Enjoy!
Joan
Joan’s Sewing Group | Pinterest
Download this Freebie
Enter your email address below to instantly download this freebie now!Like and share this post with your stitchy friends.


Where can I buy Lexi fabric?
Hi Janice, My Lexi fabric line from QT Fabrics will ship to stores in November 2019. Ask your local shop to carry it or find it online.
These were great tips on organizing projects. I have several wallets I plan to make and put all the coordinating fabrics, thread, zippers in one plastic container. With your super tips & tricks I’m going to re-do the organization and selection process. Thanks so much for providing a reference sheet.