Part 3: Tips for a Successful Bag Project
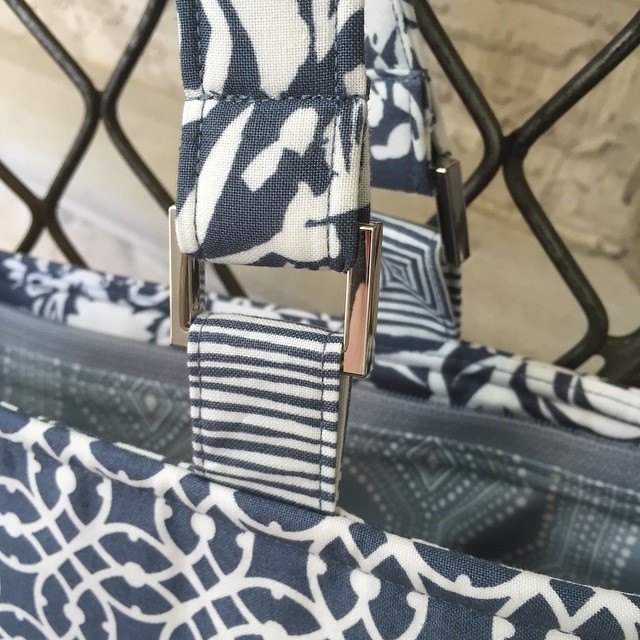
Lazies, In this post I focus on the all-important top edge of the bag. The opening to the main compartment of the bag garners a lot of attention and use. And, there is a lot going on there. All worlds collide here. Handles are attached, the outside and inside join at the most noticeable spot on the bag, a zipper is installed and some of our stitching shows. Form, fashion, and function throw a party at the top of the world on this bag design. No pressure, right? Let’s get started! Links to previous posts at the end.
Here’s our unassuming little sweetheart of a case study. This is my Candice Purse design, all dressed up in Paradiso by Kate Spain for Moda Fabrics. Yum!
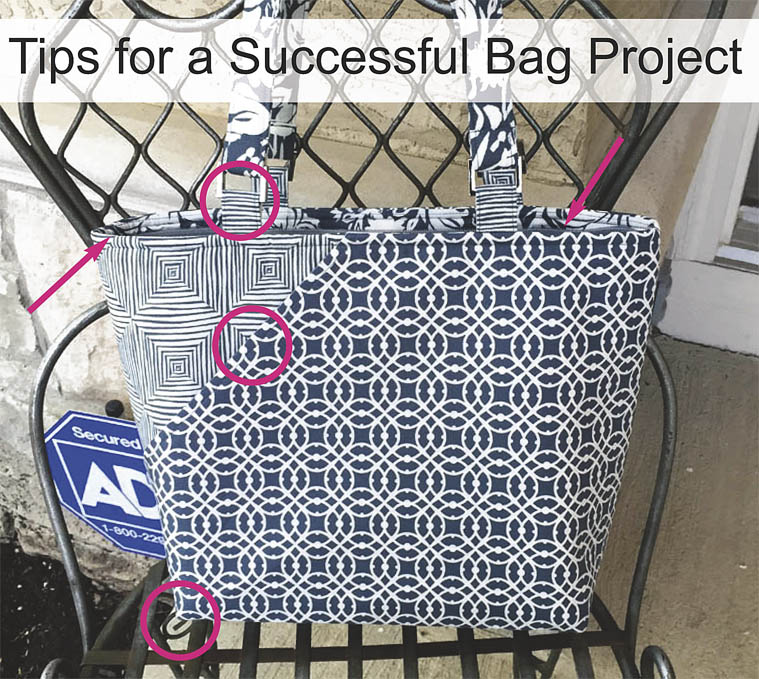
Lazy Tip 7: Rollover, Rollover!
During final construction and pressing, roll the top edge seam slightly to the inside for an incredible, elegant, professional finish. Topstitch through all layers to secure. For best results, I press this seam open, then toward the lining during construction.
Folding fabric next to the seam rather than at the seam is easier, looks better here, and disarms the combative nature of this important seam, changing it from unruly bulk to silent boning, adding support for the top edge, rather than taking over.
Landing a seam at the top edge puts it in charge, stretches and shows the stitches, and can look like a constant battle of the bulge.
Lazy Tip 8: I’ll Have Mine on the Side, Please
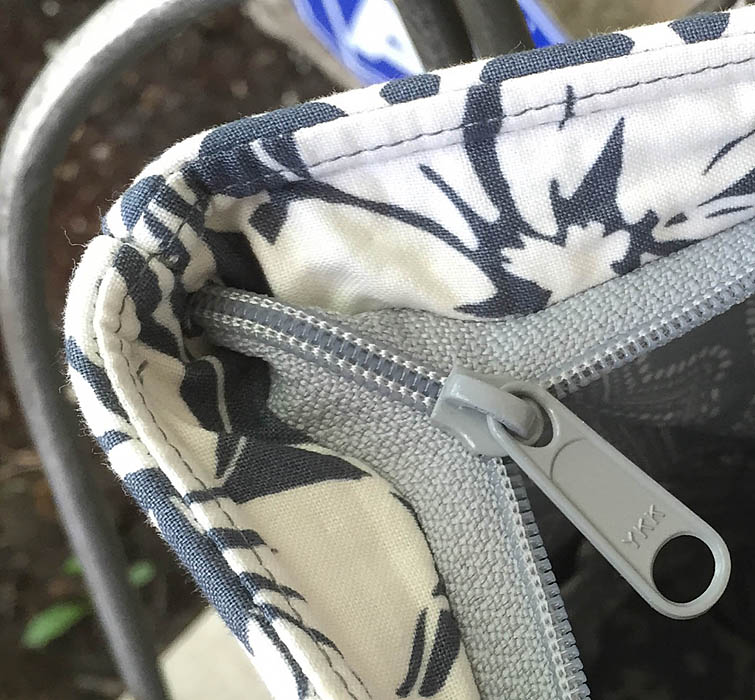
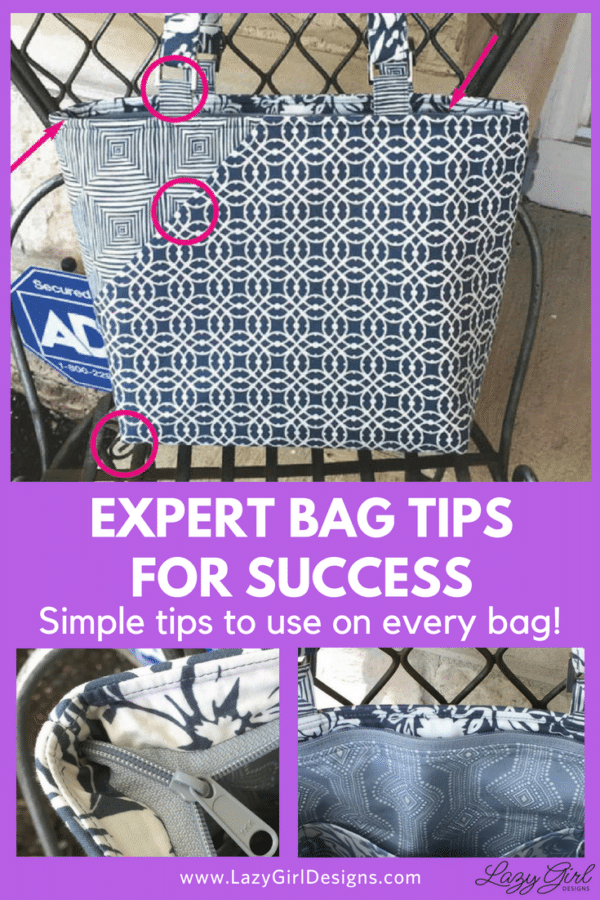
When topstitching around the top edge of the bag, I stitch to the side, or next to, the bulk of the seam allowance. It encases the seam allowance, creates a delightful bump or guardrail at the top edge of the bag, and it nearly conceals the stitching on the lining side. There are two pictures to check out here. In the first picture below, look just below the handle attachment in the top right corner. I see two lines of stitching. Now, visually follow both lines of stitching to the left toward the zipper pull. The lower line of stitching looks like it disappears.
In the above picture the lower line of stitching is the final topstitching around the top edge of the bag. Due to the bulk of the seam allowance, the stitching is pulled out of sight and you only see a slight indentation where the stitching is. Magic! The top line of stitching was created earlier when the bag was flat and the seam allowance was stitched only to the lining.
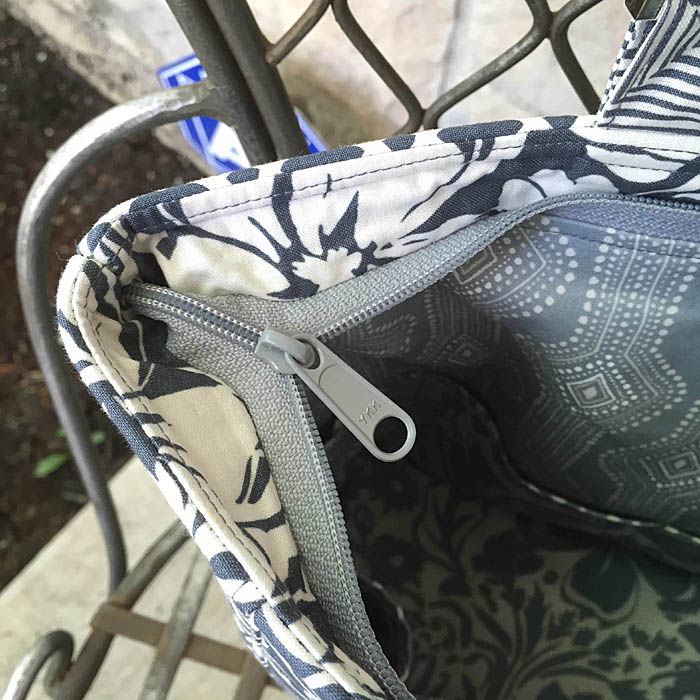
In the picture below, you can see the final line of topstitching on the outside of the bag, just below where the handle is attached. That stitching cinches the outside and inside fabric together, encasing the bulk of the seam allowance in a nice, tidy attractive bundle at the top edge of the bag. It’s a simple way to add dimension and sophistication to your bag.
Conveniently, the other thing this technique does is eliminate the need for both lines of stitching to be even with each other for the entire top edge of the bag.
Lazy Tip 9: Transition Permission!
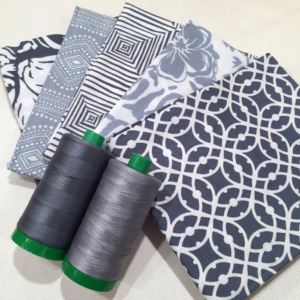
Go wild or mild – the zip gives you permission to treat the lining as a separate bag when choosing fabric. In a monochromatic project of this size, a little change goes a long way. The volume of the lighter gray fabric is a nice visual balance to the weight of the darker gray outside of the bag. I chose to continue the darker fabric above the zipper and use the zipper as the transition point rather than the top edge of the bag.
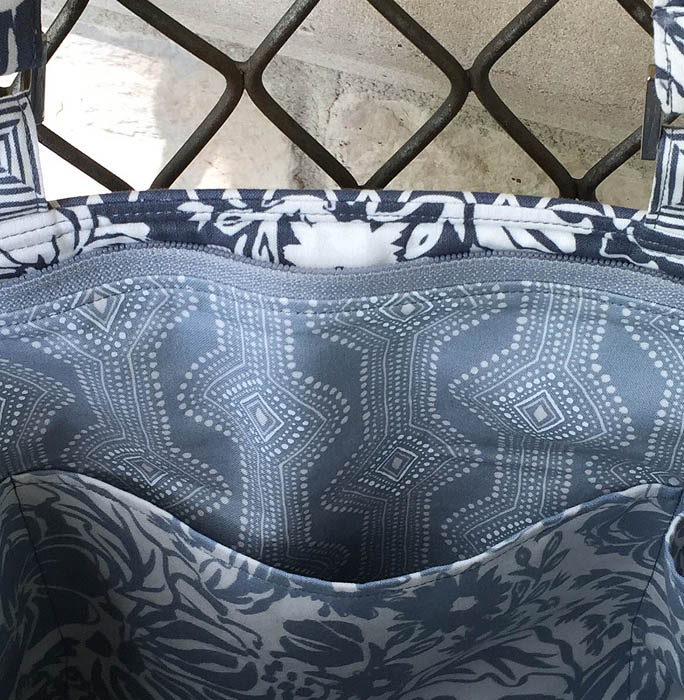
I like a lighter color lining so I can see what’s in my bag. Any of the fabrics in this collection would have been a good choice. Did you even notice that I switched from the two dark geometrics on the outside of the bag to the dark floral above the zipper? The soft random structure of the floral against the geometric of the striped lining brings attention to the zipper rather than the change in fabric colors.
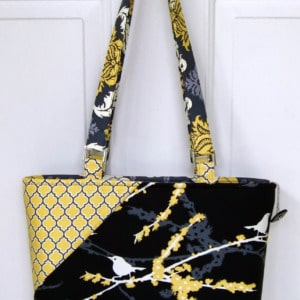
Candice Purse Pattern
Here’s the pattern I’m using for this series. It’s my Candice Purse LGD130. It includes not only all of the fun details we’ve already explored, but it’s the design where I introduced my simple ‘fat pockets’ technique. An easy way to construct flat pockets with depth for a notebook, eTablet without pulling on nearby pockets. Sweet! I use the fat pocket for my ‘office’ in my purse – paperwork, small pad of paper, iPad mini, receipts, etc.

Did you miss the previous posts in this series: Part 1 and Part 2
That’s Pinterest-ing!
Join me on Pinterest here, remember to ‘Follow’ me there, and pin this post and pics to your Pinterest boards to save this idea.
New to our blog? Subscribe to get emails so you don’t miss a juicy morsel.
Like and share this post with your stitchy friends.
Join me in the Lazy Girl community on Facebook here: Facebook Lazy Girl
Enjoy!
Joan
Instagram @JoanHawley
Facebook Lazy Girl
Pinterest Joan Hawley


just made your sweet pea pod and it was easier than I thought thanks for the good directions will make some more cant believe they went together that well
I just finished your Margo Handbag and love it! I especially appreciate your easy directions! I have made other purses from patterns where the directions were difficult to understand, but you did a really good job of explaining and showing pictures that really helped! Thanks!
Do you have any videos demonstrating your bag-top finishing techniques? I’m more of a visual learner. Thank you!