Perfect Button Placement Can Be Sticky
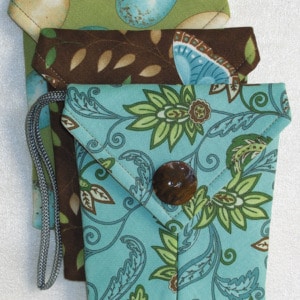
Lazies, In order to get perfect button placement on a project, wouldn’t it be great if buttons were stick-on and you could plop them down on your project right where you need them? Well, we can make that happen! Here are some Maggies I made recently, and I used a simple trick to hold the buttons in place while stitching them on using my sewing machine.
")
Large and small ‘Maggies’, item LGD126.
Fabric is ‘Blush’ by Moda. Great colors and patterns.
A show-stopping button
If your button is a show-stopper, then its placement better be perfect. I like to add a big fabulous button to adorn the large size Maggie bags. Sewing the button in place is the last thing I do when making a Maggie. So that means the Velcro is already fused on the lining side. And sewing a button through all those layers and the Velcro is not something I want to do by hand. No thank you!
When I need to place a feature button perfectly, I use double-sided tape from the office supply store on the back of the button to hold it in place while I sew. I use a piece of tape that is at least twice the width of the button and center it on the back of the button, usually over the holes that will be sewn through. A bit of tape sticks out past the edges of the button.

On my machine, I drop the feed dogs and select a zigzag stitch. Set the stitch length to zero. Adjust the stitch width to match the holes on the button. I usually do a few practice stitches on a scrap of fabric, then hold the fabric up to the button to see how close it matches. Place the button on your project and slide your project under the presser foot. Gently lower the presser foot and manage the button so the holes are visible through the opening in the presser foot. Lower the presser foot.
Give it a whirl, literally
By hand, gently crank the wheel to lower the needle and see if it is lined up with the button hole. Continue to gently crank the wheel by hand until the needle does its first zigzag and heads for the other button hole. Adjust the stitch width as needed to make sure the needle will hit both holes without hitting the button. When the stitch width is just right, sew that baby in place with a few stitches. You can leave a long thread tail and pull it to the underside with a hand needle if you like. I add a drop or two of fray check on the underside.
")
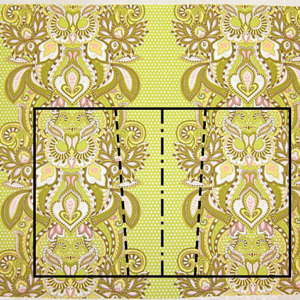
Fabric is ‘Simple Abundance’ by Moda. Love it!
Twice the fun
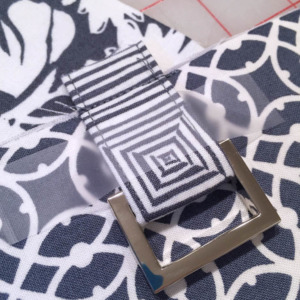
The big button above had four holes. I used the same technique and simply lined the button up twice for sewing. I did take it out of the machine between stitchings and cut the thread tail. I did not want the thread to go from one stitching to the next and be tight against the button where I couldn’t get to it with my scissors as shown below on a previous project. Shame on me for not fixing that.

I Lazily didn’t cut the thread between stitchings and ended up with an extra thread
crossing the center of the button.
After the button is sewn in place, simply grab the tape and tear it away. If the tape covered the holes, then the stitching would penetrate the tape and make it easy to tear at the stitching and come right off. Otherwise, snip the tape with the end of your scissors to get started.
If you get a little tape gunk on your needle, it’s easy enough to clean off with a little rubbing alcohol on fabric. Or pick up some of the little alcohol wipes at the drug store and keep some with your sewing tools.
I filled each of these large Maggies with a pack of tissues and the smaller Maggies for gifts recently. I used four fabrics from Moda layer cakes to make each set of Maggies.
Enjoy!
Joan


Joan, I love the Maggies and your choices of fabrics. Where did you find the buttons that match the fabric so well?
Hi Gita, Whenever I’m in a fabric store, I swing by the buttons and pick up a couple that appeal to me and build my button stash. I pick colors I like and sizes I use most often. Joan
Excellent idea and boy did I get some buttons at the MidAtlantic quilt show this weekend. Iwill post a pick of my bounty this afternoon. I never thought of tape to hold them in place, mine always move from where I want them!
Penny in Chesapeake
Good Monday Joan. This was a great little tutorial to wake up to since I’ve just developed a severe case of buttonitis. It started with a pincushion I bought from a collector of vintage Japanese textiles who had used the loveliest antique glass button to decorate a bowl-style cushion. Of course, the cushion accompanied me home. I will never be the same again. so it was lovely to see your post so I can get down to using some of the beauties I’ve been harvesting in a more assured way.
To some of my friends’ dismay, I’ve started looking at the ones on their shirts and jackets with untowardly interest.
Have not committed any criminal acts yet but have had the thoughts.
I do something similar. I use a glue stick to stick the button in place while I machine stitch it on. It makes a lot of difference to have the button firmly in place where you want it.
Great idea! Just an FYI, most buttons have the same distance between the holes. The only exceptions are handmade ones and really weird artsy buttons. SO…when you’ve figured out your machine settings for the stitch width, make a note of it. It will work on almost every button you can buy. I’d check with the hand crank method anyway, to make sure you’ve got it lined up just right, but no need to re-invent the wheel every time you decide to apply buttons!
On my Wonder Wallets I centre the button by gluing it down using a glue stick. It doesn’t take a lot, but holds it in place while I zigzag it on.
I like to use the zigzag stitch that has the two straight stitches on each side between the zig and the zag. Its a hemming stitch I think. That way your zigzag is locked in place. More than once Ive grabbed a stray thread and pulled only to have my button come completely off. Doesnt happen if you use this stitch.
These are some great ideas! I love buttons and I collect them here and there. Julie, I like your idea of using the blind hem stitch to sew on buttons. That is really cool and something I had not heard. That will really secure the button for sure!
Why didn’t I think of that! I try to hold it and not get my fingers involved! Thanks Joan ~ GREAT idea!!!
Blessings,
Bunny
Great instructions Joan! I do things almost exactly the same, except that I use Wonder Tape to hold the button down. It’s a two-sided tape that will wash away. Use just a very small piece under your button, and you’ll never know it’s there. I haven’t had any troubles with gunky needles either.
Keep ’em comin!
Leanne
Pingback: Tutorial: Perfect button placement with double-sided tape · Sewing @ CraftGossip
Thanks for the button info, I will surely try it as I am making more wonder wallets which are requested by my family. By the way Joan, how is your Dad doing? I think about him and your family and keep you all in my prayers.
Becky
Wow what a great idea for button placement…..I’ll use for clothing construction too! Why didn’t I think of that….I also like to stack buttons and use contrasting thread to beef up the art to wear factor….great buttons?…no better place than http://www.waechters.com
Love it! LAURA
I use a glue stick also to hold my buttons in place while I sew. I’ve never heard of Wonder Tape, I love it, it’s even lazier than the glue stick!! I’m going to see if I can find some.
Yolanda, your “buttonitis” is hysterical, I had such a good chuckle over your comments.
Sheila
Dear Joan,
Thank you for this information! I would never have thought to use double stick tape or gluestick to hold the button in place, nor would I have thought to sew the button on by machine!! I just successfully sewed a button on a Maggie using both of these tips.
Your Lazy Girl patterns are genius, and the additional information via your blog is helpful as well as motivating! 🙂
Gayla