Tutorial: Make a Snazzy Purse in 3 Simple Steps Using Ribbon and Bias Tape
 Lazies, Here is a snazzy surface treatment for your next purse using ribbon and bias tape. It’s a technique developed by my friend Cecile of Just Another Button Company. I issued a challenge to Cecile and this technique along with the click-n-print free idea sheet showing her bag at the end of this post were the result.
Let’s get started. Our sample uses the Katy Bags pattern from Lazy Girl Designs. You can use this surface treatment for any design.
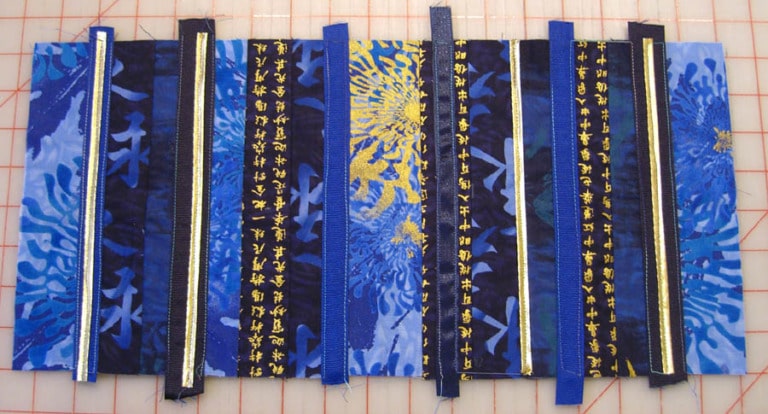
Gather your supplies. Get a whole bunch of stuff that goes with your feature fabric. Here, we’ve gathered coordinating fabric strips, grossgrain ribbon and fusible bias tape.

Step 1: Follow the simple instructions in the information sheet to place and stitch the fabric strips to the cover fabric.

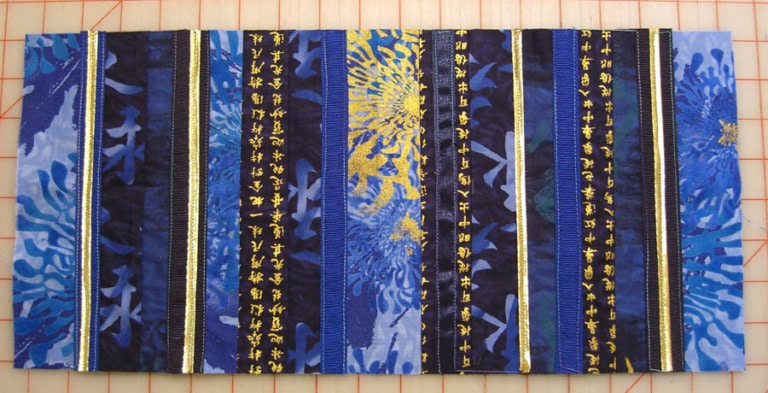
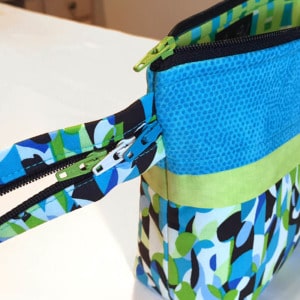
Step 2: Add ribbon and bias tape. Randomly place ribbon on top of the fabric strips, covering seams or centered. Just a few will do. Don’t forget the fusible gold bias tape we show here. We added a bit of that to increase the amount of gold in this project. Stitch all the ribbon and fuse and stitch the bias tape in place.
Step 3: Trim the extra length of ribbon and fabric from the edges. Then finish the project as per the instructions in the pattern.
Thanks Cecile for this fun and easy surface treatment. I love this technique!
Click here for a printable version of this free tutorial.
Enjoy!
Joan
Handles and fusible gold bias tape from Clover Needlcraft. The beautiful fabrics are from Lonni Rossi.
Subscribe to our blog so you don’t miss a juicy morsel.
[tags]free project, embellishment, sewing pattern, quilt project, small handbag[/tags]


Where can I find your Lazy tips? This was great. Susan
Hi Susan,
I’m glad you like this techinque. I love it, too. We do have more good stuff to post so hang in there, it’s coming.
Did you see the Mock Felted Purse tip from a few days ago? It was two posts ago.
Joan
hi joan, i love your website and i love the simplicity of your bags. the katy bag is so cute, but how do you finish it? i am also a quilter, so the “flip and stitch” method really grabbed my attention, but how do i finish the bag? do i need to order a pattern? thanks! alice
Hi Alice,
Thank you for your kind words about my designs. I love our Katy Bags pattern – it’s perfect for experimenting like this stitch and flip method. You’ll need the pattern to complete this project, or use the technique for a surface treatment on any project.
We recently showcased another project using the Katy Bags here:
http://www.lazygirldesigns.com/blog/?p=26
in ‘Make a Bag Worth Bragging About’
Thanks!
Joan
I love this design and embellishment idea. This is a great idea to dress up a favorite print for a purse and/or use up some left over ribbon, laces and other embellishments that you don’t know what to do with. I’m thinking of using vintage lace and ribbons for a more antique look and maybe some old buttons too. The sky’s the limit with this great idea.
Pingback: Lazy Girl Designs inspirations for quilt and sewing patterns from Joan Hawley!
The www looks so neat, is the pattern available on lne, I looked for it and didn’t find
Char
Hi Charlotte,
We used the Katy Bags pattern for this project. The pattern is available online through lots of quilt shops or through http://www.quilterswarehouse.com
I’m glad you like the project.
Joan
Pingback: Lazy Girl Designs inspirations for quilt and sewing patterns from Joan Hawley!
Here is some pictures of the Katy bag I recently made. I love the dog one, I might just make that!
Pingback: Purse Patterns, Tote Bag Patterns, Quilt and Sewing Patterns from Joan Hawley of Lazy Girl Designs
So pretty, and what a great idea! Cecile always has wonderful ideas 🙂