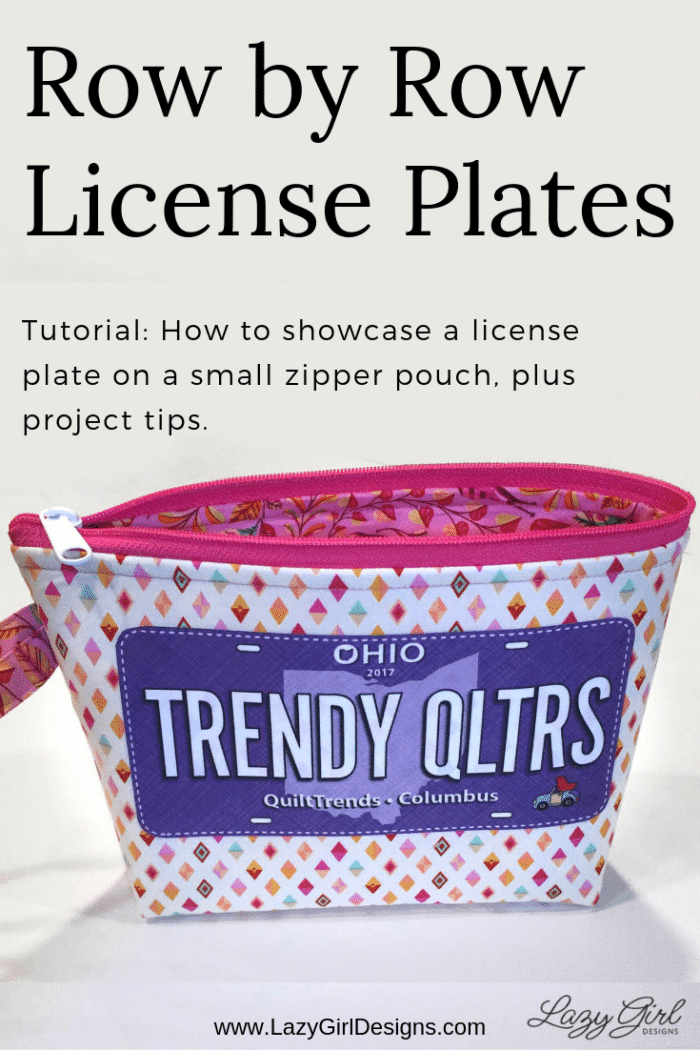
How To Make The Most Of A Precious Row by Row Fabric License Plate
Feature a Row by Row fabric license plate on your next sewing project.
Lazies, If you’ve collected some of the cute Row by Row license plates, try showcasing one of them on a Becca Bag! Learn my sensible tips, tricks and techniques for a successful and quick project. Join me while I share my behind the scenes secrets for making this quick project even quicker! Then be sure to get a Becca Bags pattern of your own and put those cute license plates to use!
 Becca Bags LGD136 featuring a Row by Row plate panel.
Becca Bags Pattern Adjustment
My Becca Bag design is a quick zippered pouch project featuring two sizes. This project shows the large size.
Pattern Adjustment: Use one fabric for the outside of the bag and cut it to the same size as the lining fabric. Skip the fabric flange and top band. That is the only pattern adjustment needed for this project.
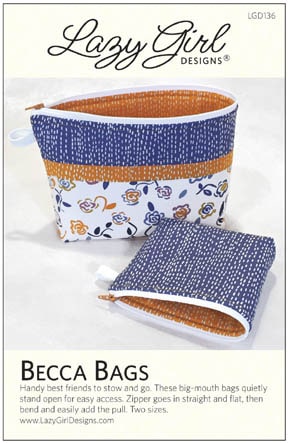
Becca Bags pattern LGD136 from Lazy Girl Designs
Optional Embellishment
Constructing Becca with a single outside fabric gives me a perfect backdrop to add this embellishment. It’s also a great approach to feature an embroidery design.
Project Supplies
We just need a few supplies for our project.
– Becca Bags pattern LGD136 from Lazy Girl Designs
– Embellishment, such as a license plate fabric panel
– Two coordinating fat quarters of fabric
– One 22” or longer polyester all-purpose zipper, ByAnnies purse zipper, brand YKK
– Dreamy Fusible Fleece SLG106 fusible fleece 8” x 22”,
– Fusi-Bond Lite SLG1011 fusible web the size of your embellishment
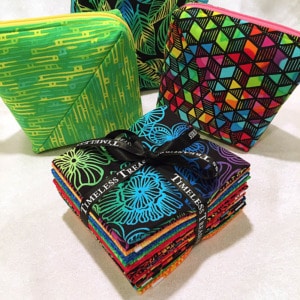
How To Choose Fabrics and a Zipper
Start by going to your fabric stash or the local quilt shop. If you plan to use a license plate or other embellishment, bring that with you! Pull supplies that coordinate or contrast.
I paired the license plate with fabrics and zippers by BERNINA ambassadors Tula Pink and Annie Unrein of byAnnie.com respectively.
 Beautiful, tasty ingredients!
Audition the Players
A technique I use to guarantee great results is to audition things before sewing. Doing so helps me quickly weed out options. It also gives me a realistic idea of how the finished project will look. The white fabric will be the outside, the pink will be the lining.
I’ve cut the fabric and stacked it, showing a bit of the pink fabric to simulate how much of each fabric I’ll see when the finished bag is unzipped and open. The license plate will shine and truly be featured atop the white fabric. This simple step of ‘staging’ the players helps me see how the colors and proportions work together.
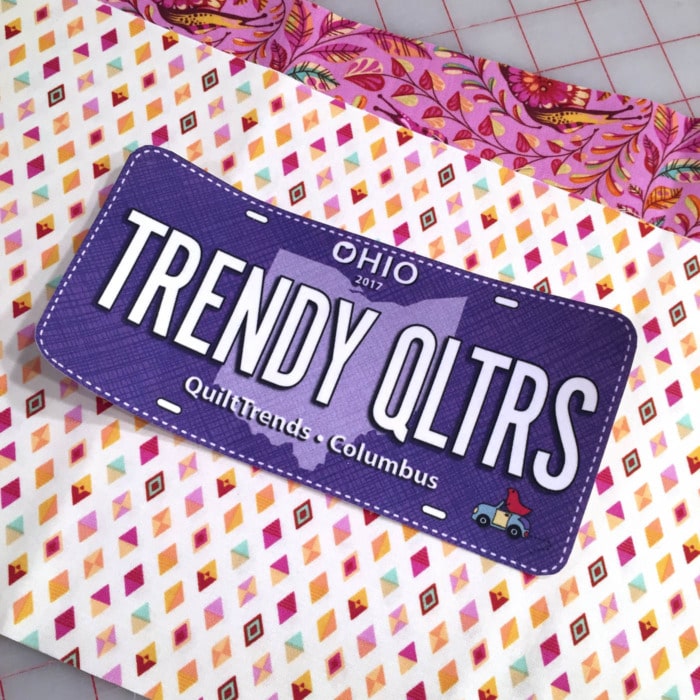 Always audition the players!
Presser Feet
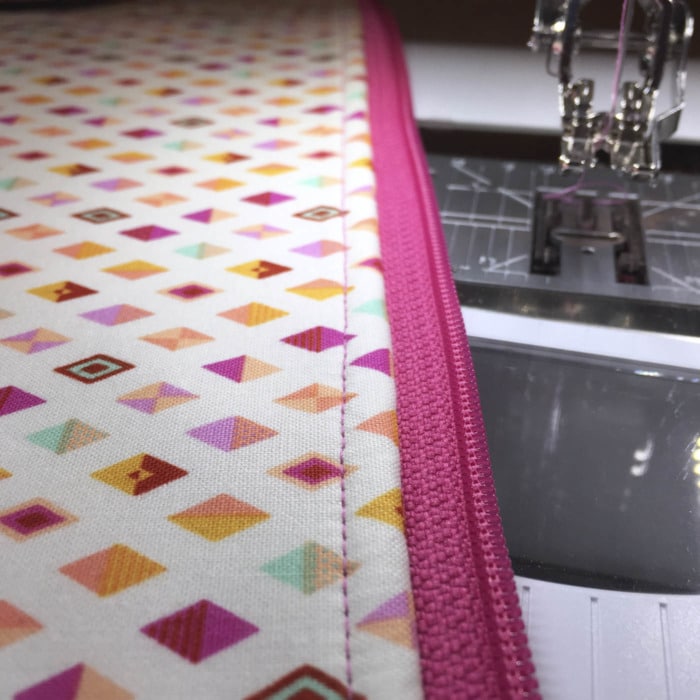
I love the BERNINA 57D foot with the little guide arm. This foot is perfect for stitching along the zipper. The guide arm is resting against the bulk of the seam allowance and that allows me to lay down a perfect line of stitching next to the zipper.
This stitching detail is prominent on the finished project, so I want it to look great. Be sure you have a foot in your tool box that allows you the same control and guarantee.
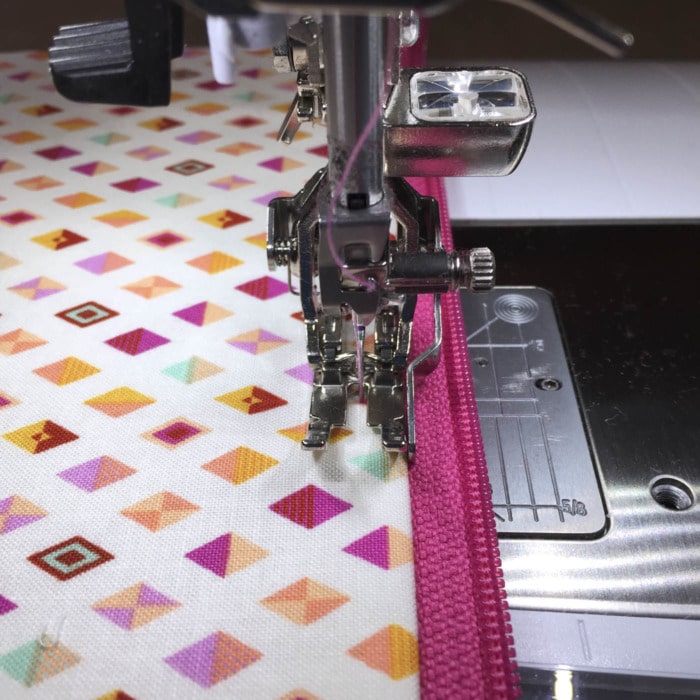 The guide arm of the BERNINA foot 57D hard at work for a perfect finish.
Tip: I increase the stitch length to 3.0 for topstitching because the stitches are so prominent. A longer stitch looks more elegant than a shorter stitch, which could look more utilitarian or stuffy here.
Look at that loveliness! It’s yummy-perfect from stem to stern. I use Aurifil 40wt thread, which is slightly heavier and more substantial than a piecing weight threaded such as 50wt thread. This hot-pink thread greets you with confidence and fun.
 This is the gorgeous result I’m looking for.
Sanity Saver
Now, this might sound like a little thing, but it is an important feature to me. I adore that my BERNINA B740 remembers my stitch settings. For this project, I adjust the default settings for both the straight stitch and the zigzag. My B740 remembers these stitch settings.
When I switch from straight to zigzag and back again, my settings are still there. When I’m sewing, I just want to sew. I don’t want to have to worry about remembering stitch settings and hope I get it right.
Tip: Make note of the stitch settings you use, and write those notes on your pattern.
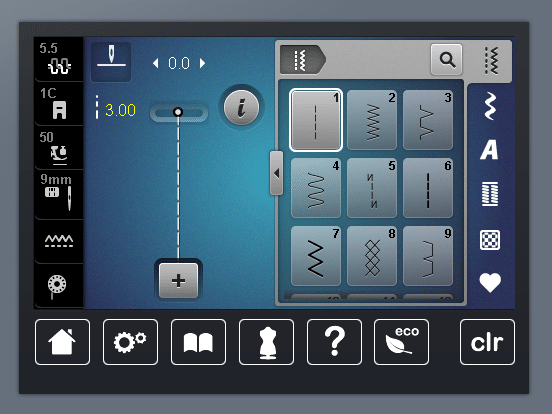
I can clearly see my stitch setting on the machine display. When I change a setting, it changes color from white to yellow. White is default, the length of 3.00 in yellow toward the top left is my adjusted setting.
Tips for Positioning the Embellishment
Add the optional embellishment after sewing the zipper in place which is Step 2 in the Becca Bags pattern. Fold the project in half to mimic the size of the finished project.
Then center the license plate from side to side, and position it about 1″ below the stitching line near the zipper.
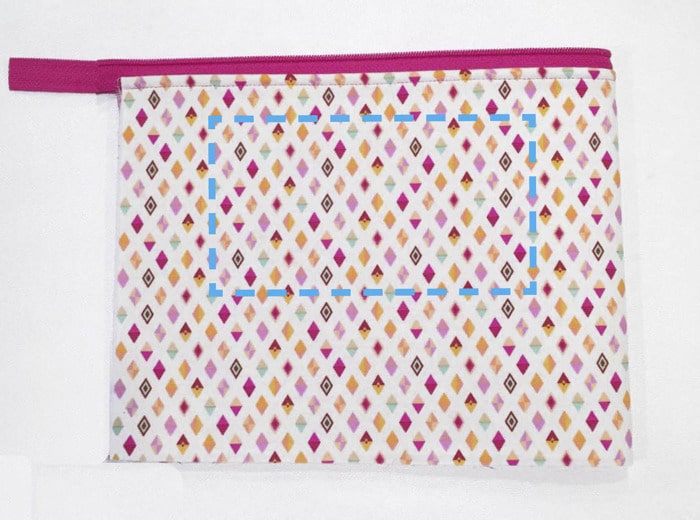 Here’s our landing target for the fabric panel.
Applique
I used my Fusi-Bond Lite adhesive web to attach the license plate to Becca. Simply fuse the adhesive web to the back of the license plate, allow to cool, trim around the plate as needed, peel the paper backing off, then fuse the plate in place. Complete the project as per the pattern directions.
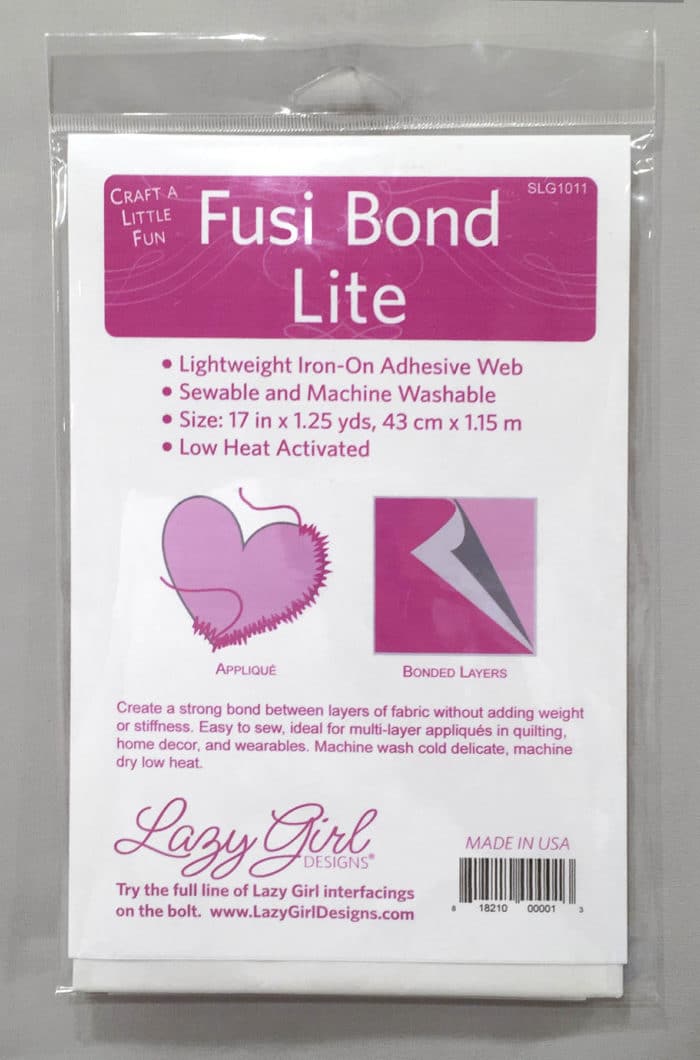 Fusi-Bond Lite adhesive web from Lazy Girl Designs.
Tip for Coordination
There aren’t many pieces to a project like this, so consider stepping outside the box to add detail here and there. I really wanted to show a little of the pink lining fabric on the outside of the bag so I made a fabric grab tab from the lining fabric and sewed it into the side seam of the bag. You can use leftover zipper teeth, ribbon, yarn or make a tab from leftover fabric.
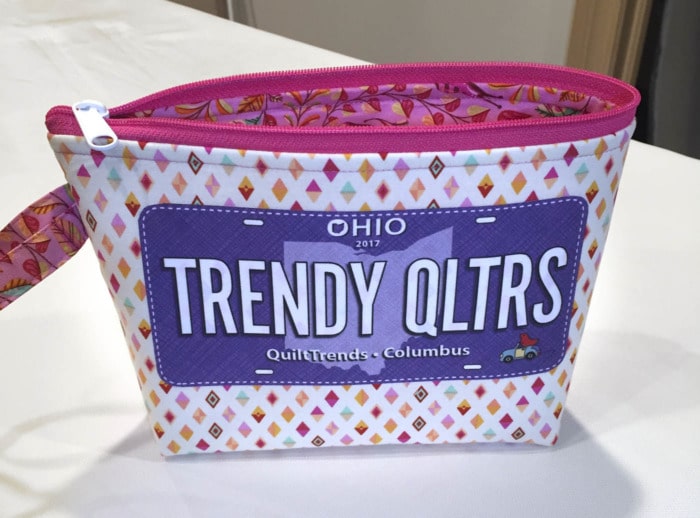
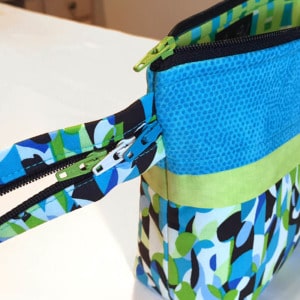
Here’s our finished project, featuring the plate front and center.
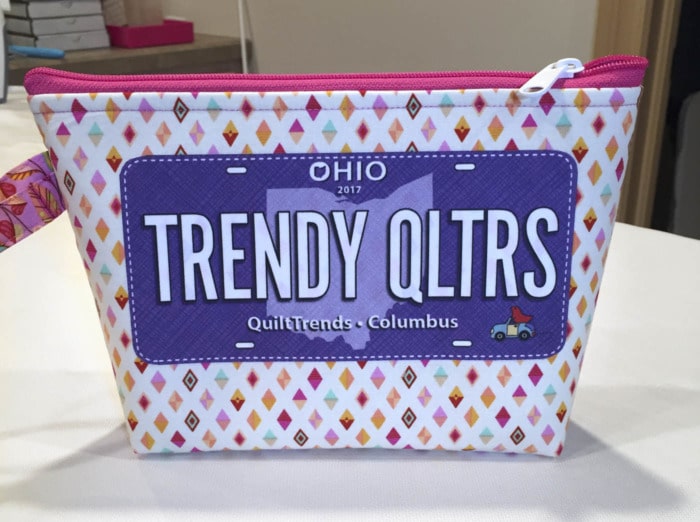 Hello gorgeous! Becca does a great job showcasing a special fabric,
embroidery or novelty like this fabric panel.
Did you notice the white zipper pull on a pink zipper? My ‘Easy-On’ trick for swapping zipper pulls is a game-changing special tip and it’s in our Becca Bags pattern.
You might also like this Recycle a Treasured T-Shirt Into a Zippered Bag post.
Get The Becca Bags PDF Sewing Pattern
The Becca Bags pattern is available as a PDF sewing pattern here.
The printed patterns are also available from your favorite quilt shop.
That’s Pinterest-ing!
Join me on Pinterest here, remember to ‘Follow’ me there, and pin this post and pics to your Pinterest boards.
Subscribe to receive emails for my blog and newsletters about new patterns and project ideas.
Enjoy!
Joan
Joan’s Sewing Group | Pinterest | Instagram | Twitter
Like and share this post with your stitchy friends.


That is awesome. Thank you for this tutorial. I have a license plate and never did anything with it.
Thanks, Joan! This looks so fun!!
Thank you for this tutorial; it is informative and easy to follow. However, it is an annoyance to have SO MANY ads pop up while I’m trying to read your how to’s. I realize that most bloggers get a commission from people clicking on these bothersome features, but dang, girl, why so many. As I was reading the text, it changed the set-up three different times and I kept losing my place while just trying to see what your next sentence was. Signed – Not A Fan of the Ads
Hi Barbara, I’m so glad you enjoyed the tutorial! And I understand about the ads. An option is to choose ‘reader view’ in your browser for my site and many other sites. It allows you to view the content of those sites without any ads, etc. Google ‘reader view’ for the device and browser you use to find specifics. Thank you for posting a comment. I appreciate it.