Dress Up Your Bag With Easy Ribbon Embellishment
Lazies, I’ve lost track of how many small zippered pouches I’ve made. They’re fun to make, use, and gift. I have some favorite patterns I go back to time and again. But – doesn’t that get boring? No way. Use the projects you already know and love to expand your sewing skills and elevate your sewing experience. The Becca Bags pattern is a perfect canvas to stretch and experiment. And it doesn’t have to be scary. Make your own guardrails to keep the project on track for your success every time.
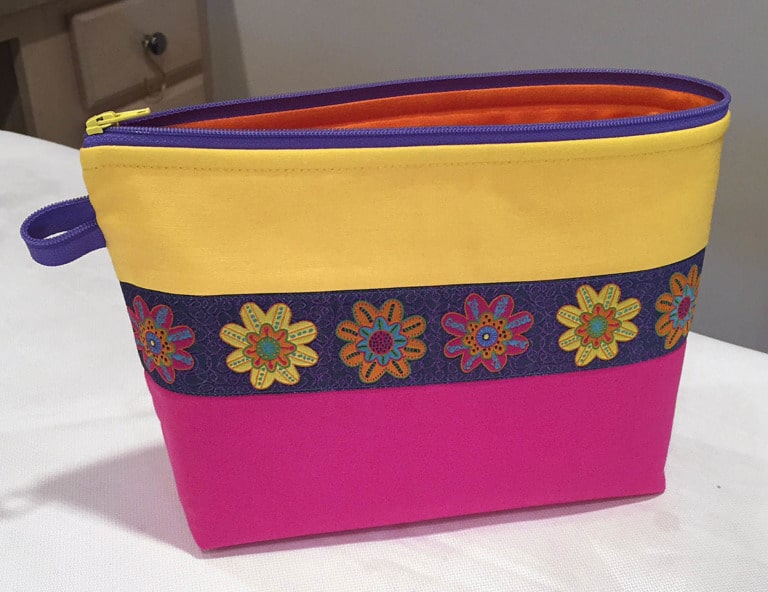
Gorgeous, functional, wide-open zip pouch. Becca Bags, pattern item LGD136
Add Ribbon or Trim
A simple, magnificent ribbon is an easy way to dress up your next zipper pouch project. I fell in love with this ribbon for its playful and colorful personality. It’s by Sue Spargo for Renaissance Ribbons.
The Players in This Zip Pouch Project
Decide on your ribbon embellishment, then add fabrics and a zipper to compliment. Tip: Think of the ribbon as the feature fabric for your project. This small quantity of ribbon is visually strong enough to give direction for the rest of the project.
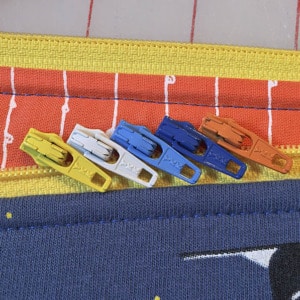
I pulled these yummy fabrics from my Kona cotton stash and added a YKK brand zipper/pull. I had to go orange on the lining fabric – I love how it looks with the purple zipper.
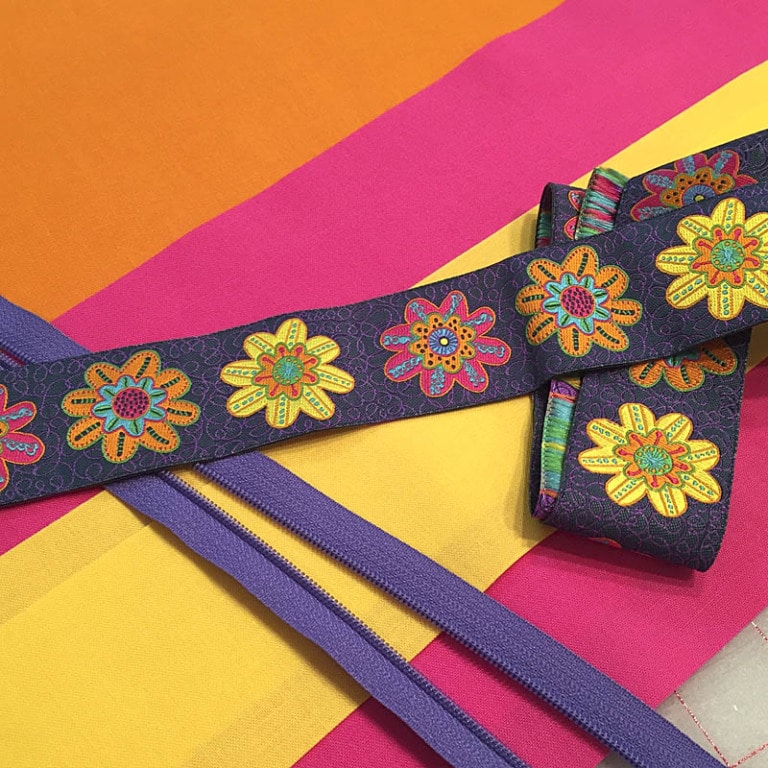
Audition all the players!
Design Alteration
Piece the top band and bottom band of the large Becca, omit the flange. Fuse the fabric to the fusible fleece. The ribbon is 1 1/2″ wide and makes a statement. It’s the showpiece on this Becca. I could place it on the yellow band, the pink band, or straddling the two. Any of these options means I have to be careful in getting the ribbon straight across the project.
Built-In Guardrail!
Use the seam at the pink/yellow fabric as a guardrail – snug the ribbon right up to that seam and topstitch in place. Doing so means this ribbon is placed perfectly straight across the project – sweet! Use a coordinating thread and a fine sewing machine needle size 70/10 or smaller. Stitch on top of the ribbon through all layers along both edges. Ideally, stitch in the same direction along both edges to ensure a smooth finish.
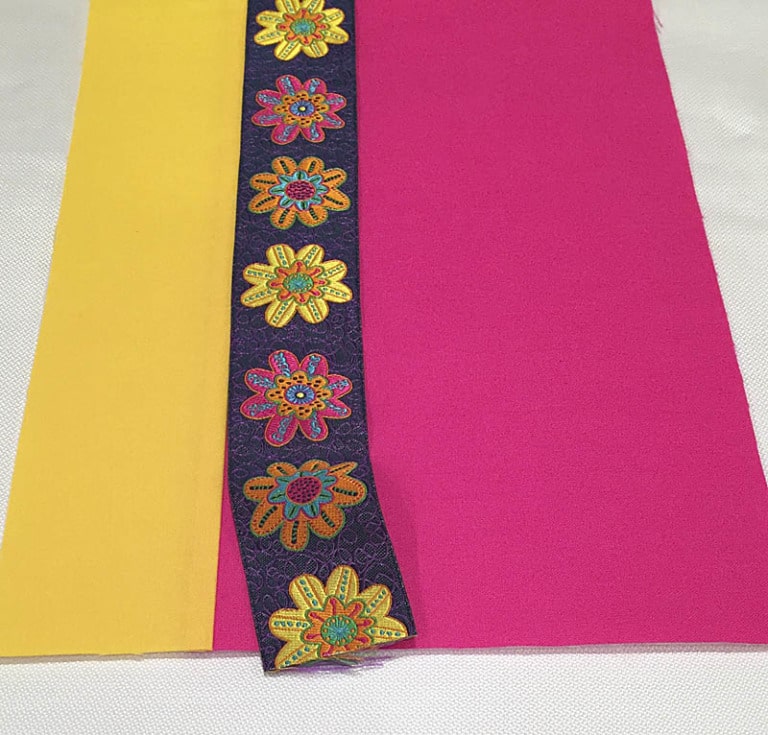
Snug the ribbon against the seam for perfect alignment!
Sewing Tip
Add a piece of double-sided sewable tape to the fabric, then position the ribbon in place. Don’t put the tape directly on the back of the ribbon because of the exposed woven threads. The tape could pull on the loose weave and ruin the right side of the ribbon, and you want to avoid a tragedy. Put the tape on your project, then arrange the ribbon. Continue to construct Becca as per the pattern.
A little ribbon or trim is an easy embellishment on our Becca Bags design.
Ribbony Goodness
Do you have a ribbon stash? I do. I’ve been collecting all types of ribbons over the years. I use small ones tied to zipper pulls. Wider ones for embellishment or to attach purse handles.
Subscribe to receive emails for my blog and newsletters about new patterns and project ideas.
Enjoy!
Joan
Joan’s Sewing Group | Pinterest
Like and share this post with your stitchy friends.