Tutorial – Add a Pocket Flap Closure To a Tote
Lazies, How would you like a little more privacy and security for the pockets in your favorite tote, purse or bag? Adding a flap closure using the new Fusion fusible Velcro is a wonderful way to make the most of this versatile notion. Be sure to grab a FREE printable tutorial (a $9.95 value) below.
Talk About Lazy!
Since the ‘Fusion’ version of Velcro is a fusible, pieces of Velcro can be added at any time during – or after – a project! The possibilities are absolutely Lazy! Otherwise, use sew-in Velcro or hook-and-loop tape and add the pocket flap while constructing the bag.
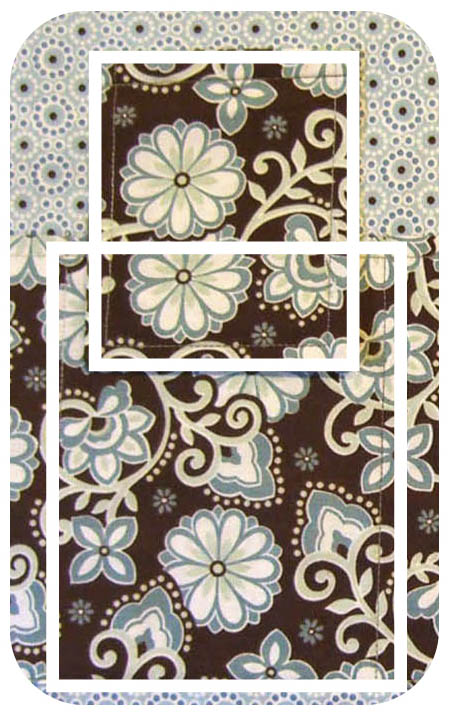
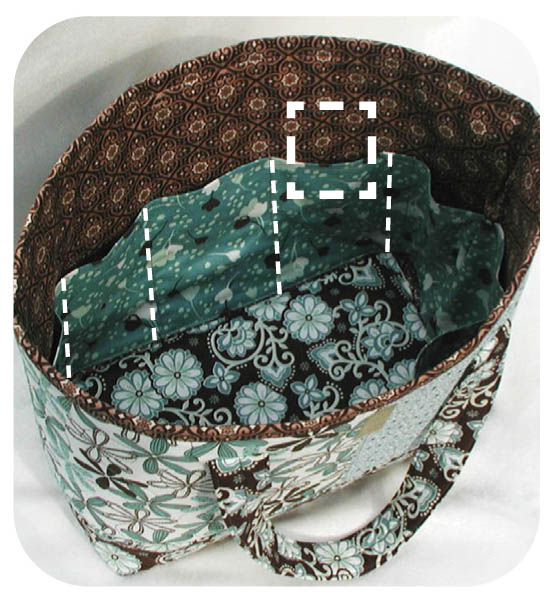 Add safety and privacy to an open-top pocket.
The white dotted square indicates where a flap closure will be added to the lining for one of these pockets.
Pockety Goodness
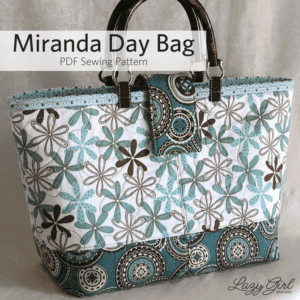
The Miranda Day Bag from Lazy Girl Designs (pattern #LGD123), is loaded with 10 ‘pockets in the round’ as shown here. I’ve highlighted the pockets in the picture above with the white dashed lines.

Lazy Exclusive!
The information contained in this tutorial is not included in the Miranda Day Bag pattern. Print the tutorial (end of this post) and keep it with your pattern.
 Make a simple flap from coordinating fabric.
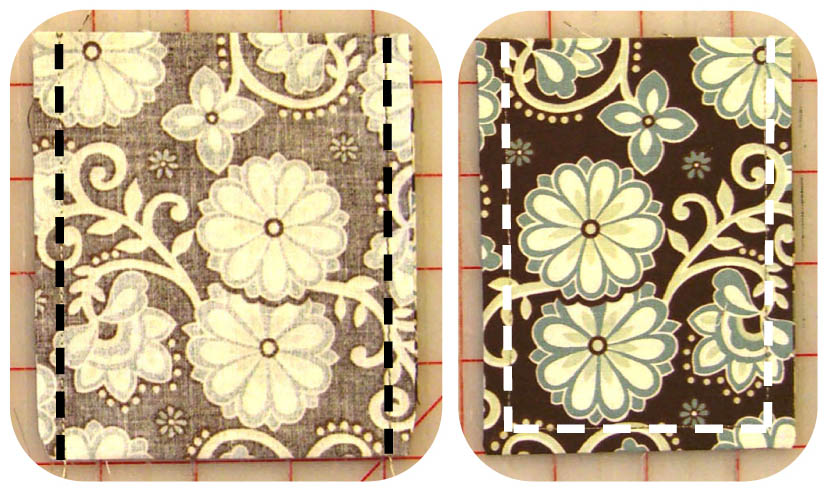
Make a Flap
– Cut a piece of fabric the width of the pocket by 9” high. My pocket is 4” wide.
– Fold flap fabric in half, right sides together, matching short edges (should measure 4” x 4 1/2”).
– Use 1/4” seam allowance, stitch side edges.
– Turn right sides out and press.
– Topstitch along the three finished edges, press.
 A little attention to the back of the flap.
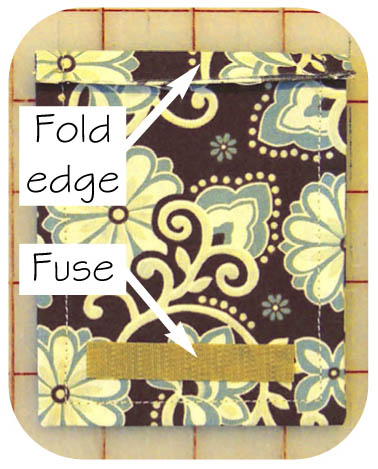
The Back Side of Flap
– Fold 1/4” at raw edge to the back side of the flap and press.
– Cut rough half of Velcro 1 1/2” to 2” long. Then cut it down the center lengthwise, approx 3/8”.
– Attach Velcro to back of flap at least 1/2” from edges. Note: Follow manufacturer’s directions for fusing.
 Overlap the pocket and flap so Velcro can meet.
Attach Flap and Velcro
– Flap and pocket should overlap 1 1/2” as shown with the two white boxes in the picture above.
– Stitch top edge of flap to lining as shown in the picture below.
– See ‘Note’ at the end to learn how to fuse rather than sew flap to bag.
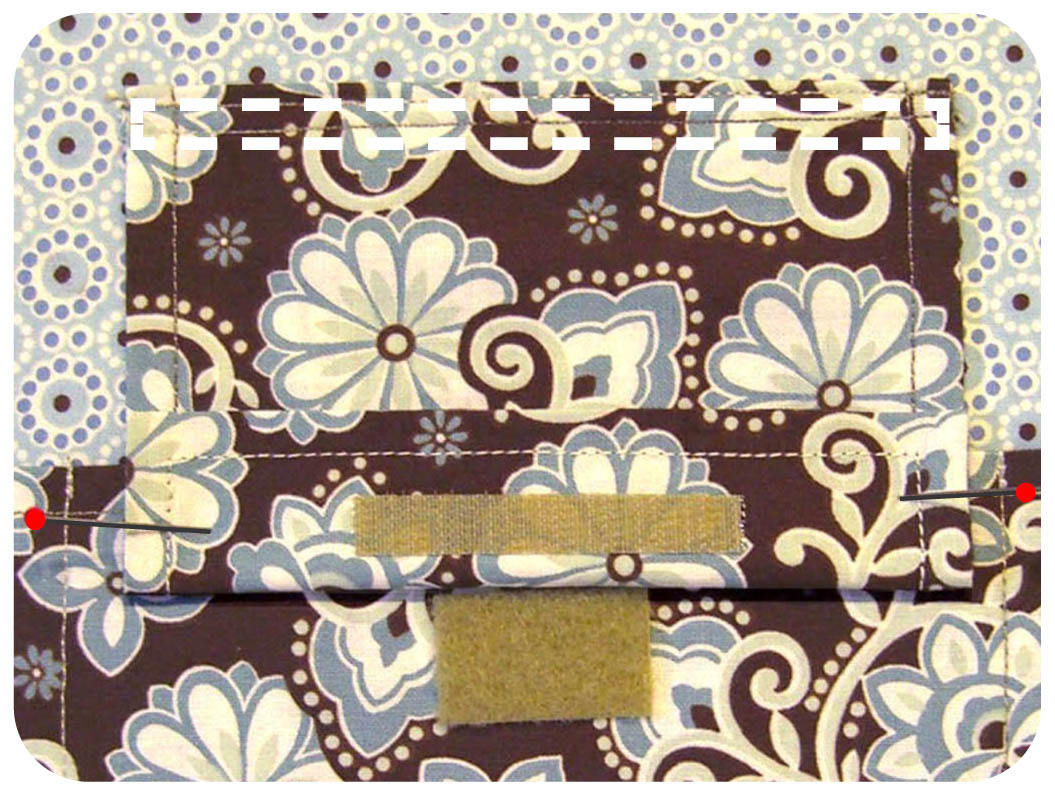
– Stitch a box pattern (shown in white toward top of picture) big enough to conceal the raw edge on back of flap.
– With flap in place, fold bottom edge back to reveal rough piece of Velcro and pin.
– Cut 1″ piece of soft half of Velcro and attach to pocket, centered below the Velcro on the flap.
– Note: I’ve sewn the flap closure in place in this tutorial. To add a flap to a finished bag, attach Velcro ‘Fusion’ to the top edge of the back of the flap, cover the raw fabric edge. Then fuse Velcro to the lining to match.
Pocket flap is done!
Be sure to grab a FREE printable tutorial (a $9.95 value) below.
Subscribe Now to get news, updates, and exclusive content from Joan.
Enjoy!
Joan
Joan’s Sewing Group | Pinterest
Download this Freebie
Enter your email address below to instantly download this freebie now!Like and share this post with your stitchy friends.


Oh Joan I love that idea. I use that fusible all the time now and have made several Wonder Wallets with it. Sometimes I have cheated on my doll outfits with it (hey ya’ gotta do what ya’ gotta do!). It’s a must have! Thanks for the tutorial I will definitely put one in my Lovely Miranda!
Penny
http://www.cottonvault.com/index.asp?PageAction=VIEWPROD&ProdID=1281
I would like to ask if it is possible to have a printer friendly way to print the instructions you have available? Thank you.
Pingback: Vertical Quilting Curve » Blog Archive » Lazy Girl Posts Free Tutorial for Purse Pocket Flap Closure
I love this purse! and I really love the fabric…. can you tell me what brand it is? I’ve been looking for chocolate/mint forever!!
Leslie in WV
Hi,
Just love all your tuts, found them just a little while ago! They’re bookmarked for sure! 🙂 There’s one thing I would have done a bit different for the pocket flap though, for security. I would have made it wider and put on lower, so that things can’t slide up, then out on the side of the flap. Of course it depends on what you plan on using the pocket for, but since you mentioned security, I flap wide enough to cover the whole width of the pocket, and low enough to actually seal the pocket opening without creating openings on the sides, would work better. I have just made my first bags this spring and added one thing that I realized a while ago that would have saved me from a lot of grief when I came home after a weekend out of town and just could not find my house and car keys!!! I called everywhere I had been, including the security at the airports etc. etc. – to no avail. After over a month, luckily didn’t order new ones in the mean time, I finally found them. Had I had a ring, loop or hook to hook them onto inside the bag, I wouldn’t have got the problem. I found them in a hidden pocket that I never discovered on that bag before, obviously I found it that one time, then forgot all about it again… I always have hooks on my keyrings, so now I hook them onto a keyring sewn into my bags, and it is so great to never have to dig down into the bag to find them, they’re easily available at the top of the bag! A carabiner hook is also great for that purpose, especially if making bags for sale, most people don’t have hooks on their keys, I guess… 🙂
Thanks again, I’ll have lots of fun digging through the tuts! 🙂
Pingback: Twin Sized Diaper Bag « The World Surrounding Me
Great idea!!